How to add Fonts from Dafont to Cricut
Do you love using fonts on your projects, but don’t have a ton of money to spend on fonts? If so, Dafont is the perfect resource for you! Dafont is a website that offers free fonts for download. In this blog post, I will show you how to use these fonts on your Cricut machine.
Please be aware most fonts on Dafont.com come with a personal license, which means they can be used for personal projects only. If you would like to use a font for commercial purposes, please contact the author of the font directly.
Now that we’ve got that out of the way, let’s get started!
Learn how to add fonts from Dafont to Cricut Design Space
Step 1) The first thing you’ll need to do is head over to Dafont.com and browse through the fonts. When you find a font that you like, click on the “Download” button. This will automatically download the font to your computer.
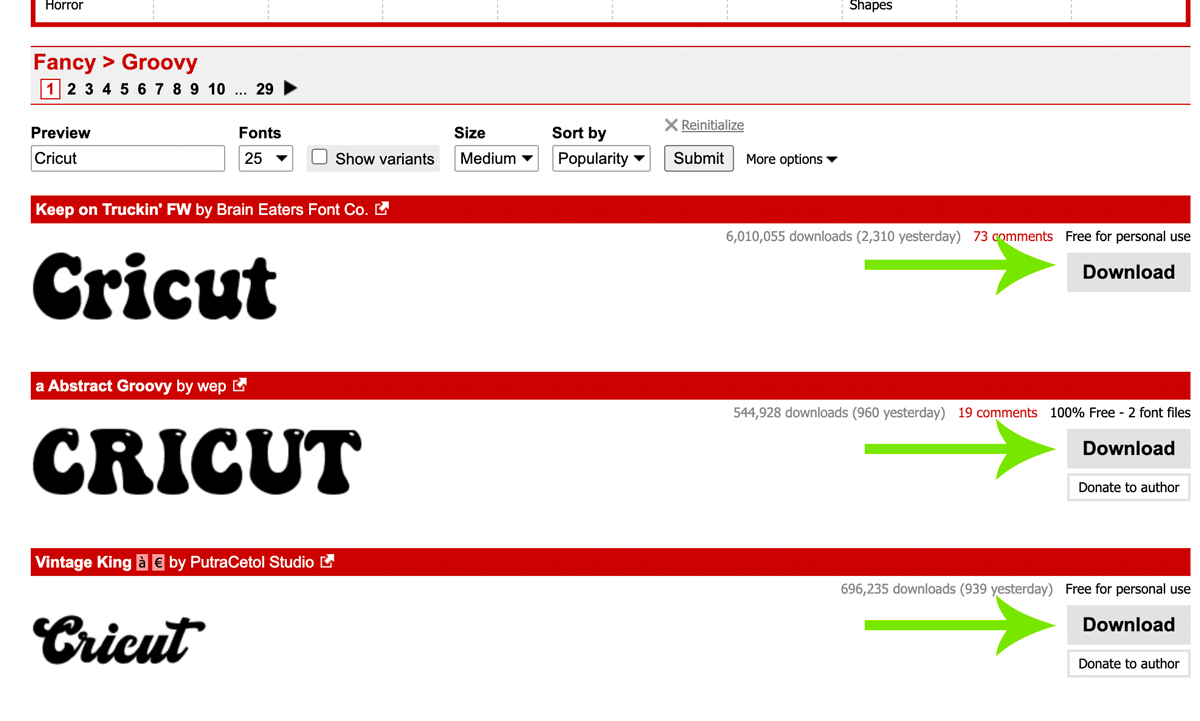
Step 2) You can type in a phrase in the Preview area on Dafont to see how the font will look.
Step 3) Once you have downloaded the font file, it will most likely be in a .zip format. Locate the downloaded .zip folder on your computer. You’ll need to unzip that file before you can use the font.
If you’re on a Windows computer, right-click on the .zip file and select “Extract All.” This will open up a window where you can select the location to save the extracted files. I like to create a new folder on my desktop for easy access.
On a Mac, double-click the .zip file and it will automatically unzip the files into a new folder.
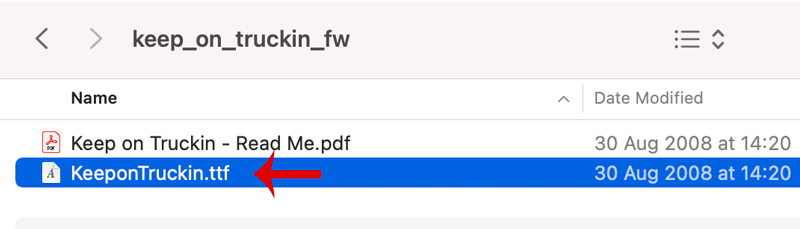
Step 4) Once you have extracted the font files, you’ll see that there are usually multiple files for each font. The file you’ll need to use is the .ttf file (this stands for TrueType Font).
Step 5) Now that you have the .ttf file, it’s time to add it to Cricut Design Space by installing the font. Double click the .ttf file to install the font on your computer.
Step 6) In Cricut Design Space, click on the “Add Text” button. A new window will pop up and at the top, you’ll see a drop-down menu that says “System Fonts.” Click on that. All the fonts installed on your computer can be found here.

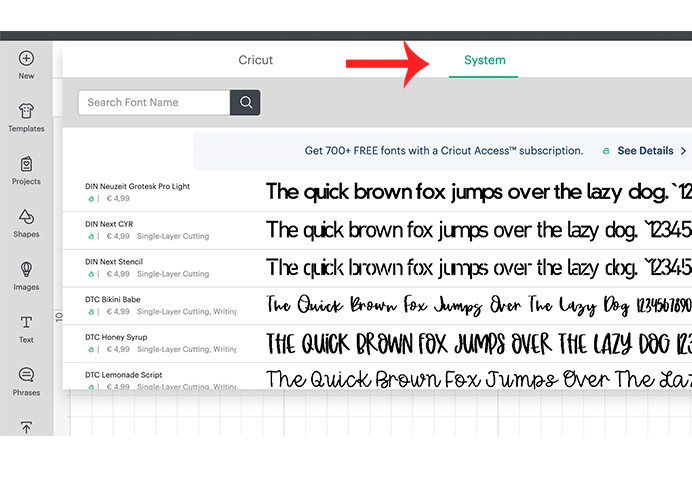
If you can’t find your installed font on Cricut Design Space, you might have to reopen Design Space.
And that’s it! You can now use your new font in Cricut Design Space. Have fun creating!
Do you have any tips for using fonts in Cricut Design Space? Share them in the comments below!
You might also like
My 5 Favorite Places to Find Free Fonts for Cricut & 11 of the Best Fonts for Cricut