Toilet Paper Roll Chick Craft (Easy Spring & Easter Activity)
There’s something about spring that makes me want to bring out all the cute animal crafts. Chicks, bunnies, little lambs, I just can’t help it. This toilet paper roll chick craft is one of those quick projects that turns out way cuter than you’d expect.
I love using toilet paper rolls for crafts like this. They’re easy to work with and a fun way to reuse something you already have. Just add a bit of paper, some googly eyes, and a feather, and suddenly you’ve got a fluffy little chick ready for spring.
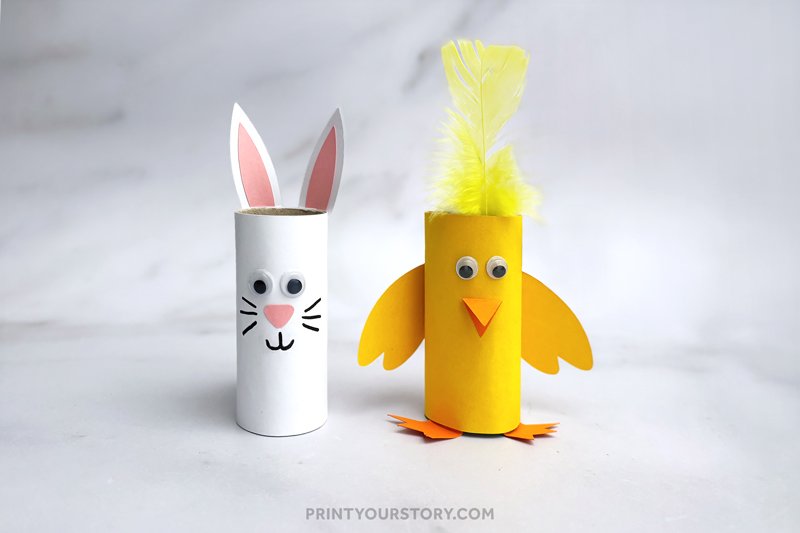
It also pairs perfectly with my Toilet Paper Roll Bunny Craft, if you want to make a whole set. These are great for Easter week, farm themes, or just an easy afternoon craft session.
What You’ll Need

What’s included in the free template
- Wings
- 2 chick feet
- 1 triangle beak (to fold)
- All parts are labeled and spaced out for easy tracing and cutting
You can use this template over and over again, just trace the shapes onto any color you like.
How to make this Toilet Paper Roll Chick Craft
Step 1: Wrap the roll
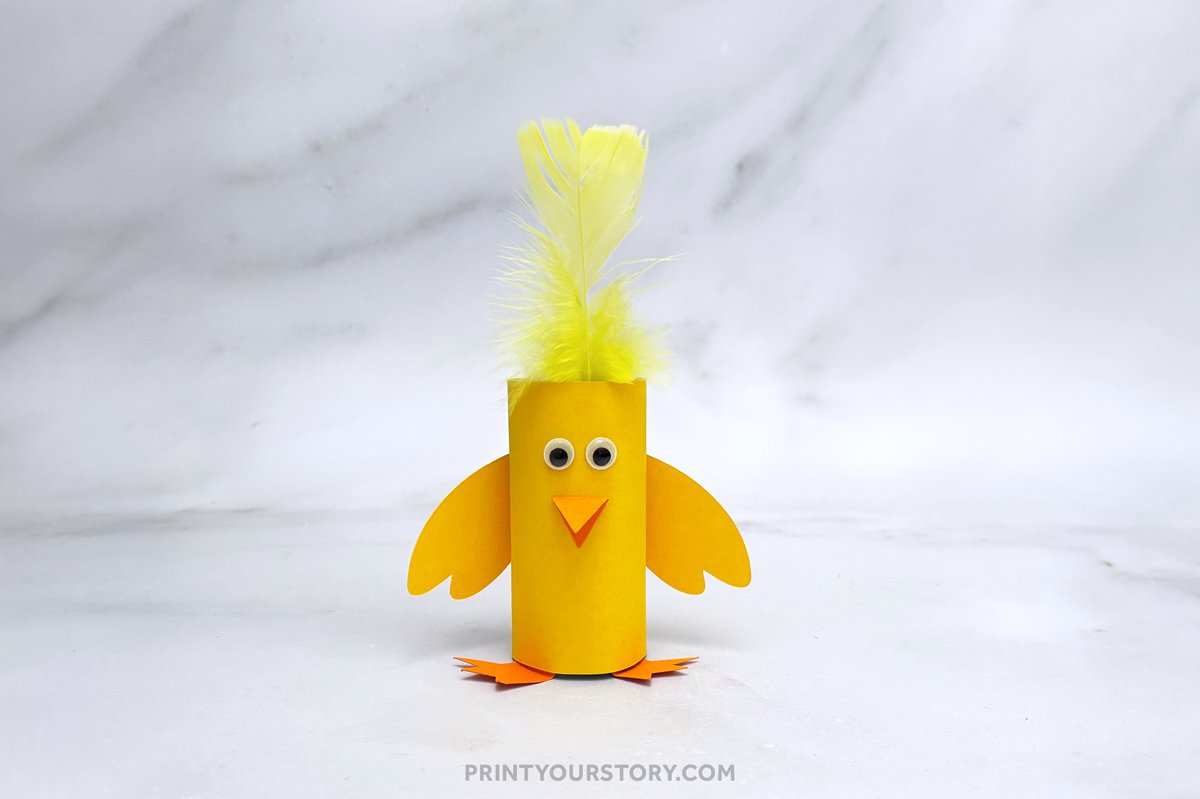
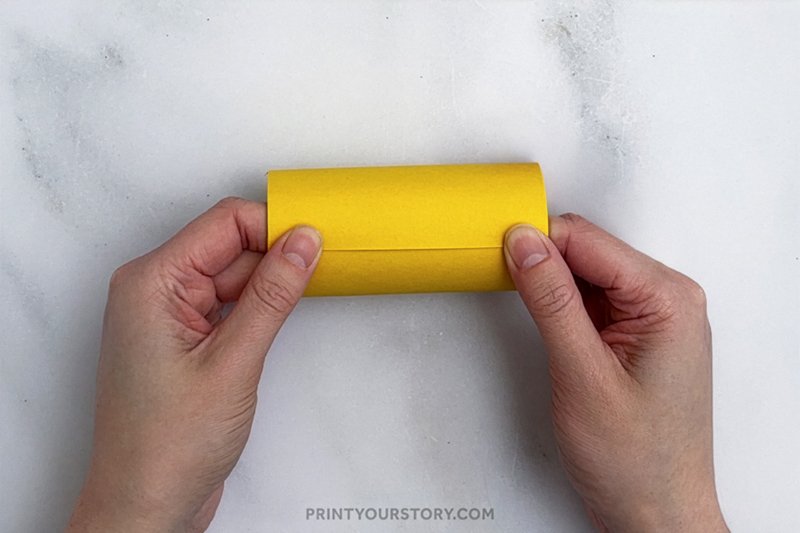
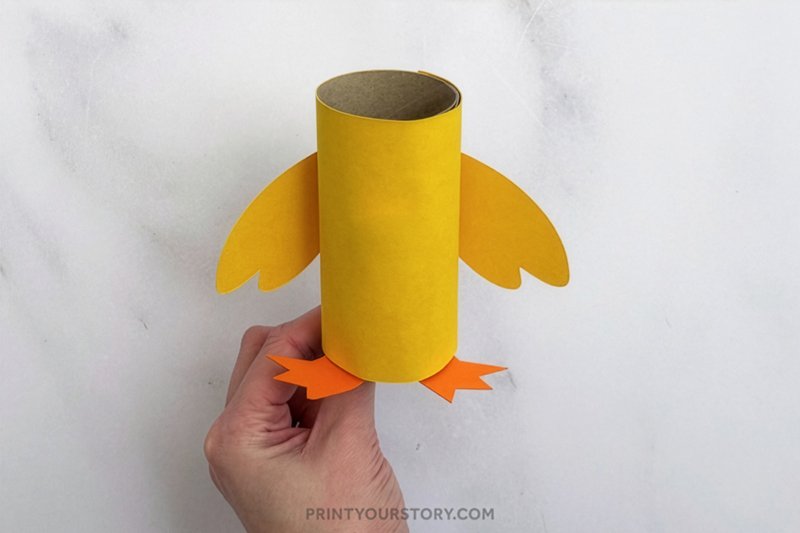
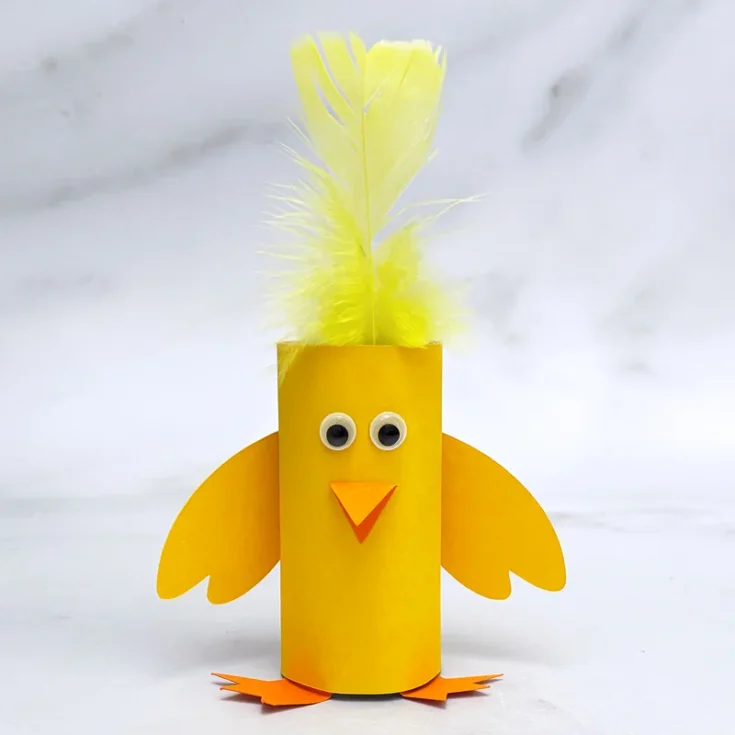
Start by cutting a rectangle of yellow construction paper big enough to cover your toilet paper roll. Wrap it snugly around the roll and secure the ends with glue or tape. Make sure it’s smooth and even all the way around. This will be the chick’s bright yellow body.
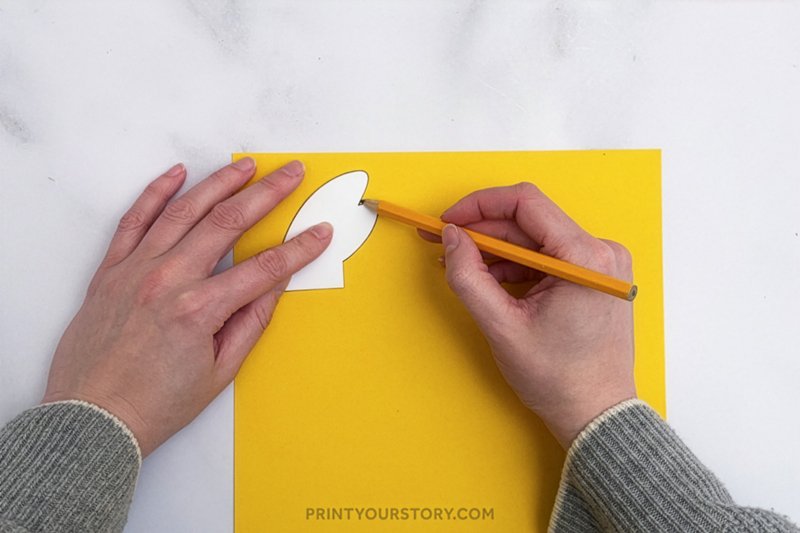
Step 2: Trace and cut the wings + feet
Grab the printable template and use it to trace two wings and two feet onto colored paper (yellow for the wings and orange for the feet looks great). The wings are soft, rounded shapes, and the feet have a cute three-toe design that’s easy to cut out. Once you’ve cut everything, glue the wings to each side of the roll.
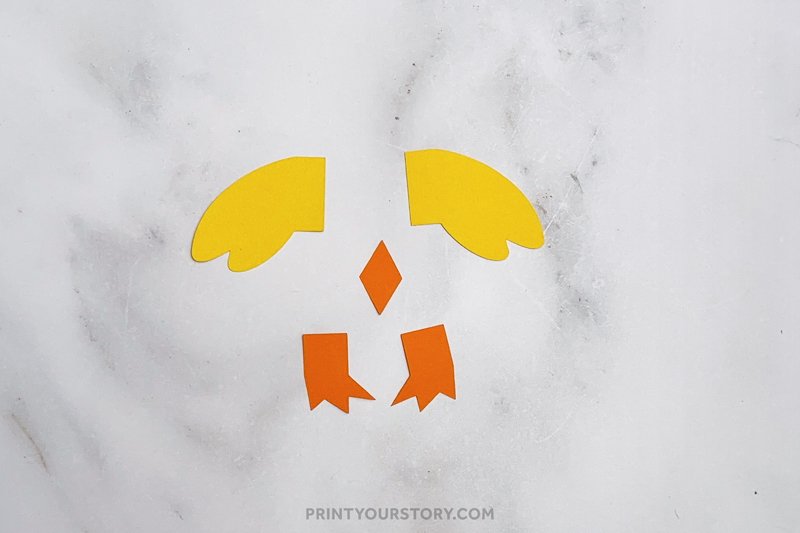
For the feet, fold a small tab at the top of each one so they can stick out from the bottom at an angle. This little fold helps the feet stand out and gives the chick a fun, 3D look. Glue the folded tabs to the inside bottom edge of the roll so the feet peek out from the front.
Step 3: Make the face
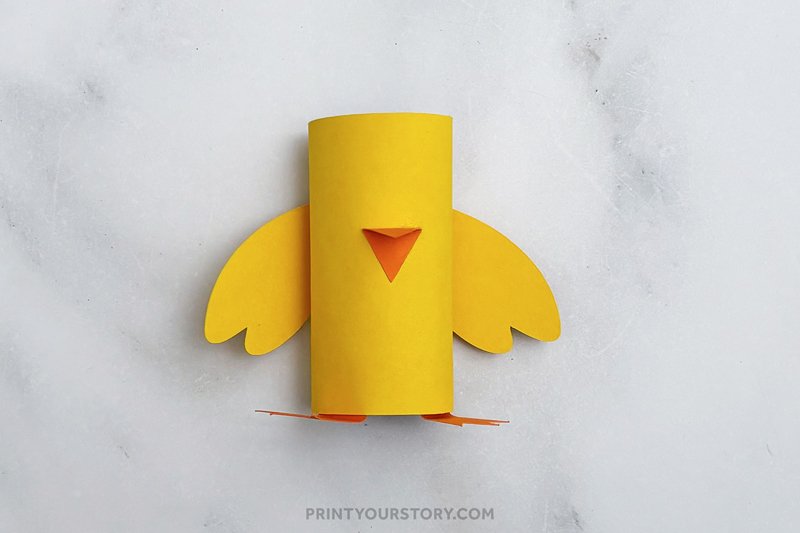
Cut a small triangle from orange paper to make the beak. You can use the printable template for this part too, or just cut your own freehand. Fold the triangle in half to create a crease, then glue just one side down near the top center of the roll. This way, the beak sticks out and gives your chick a fun 3D look.
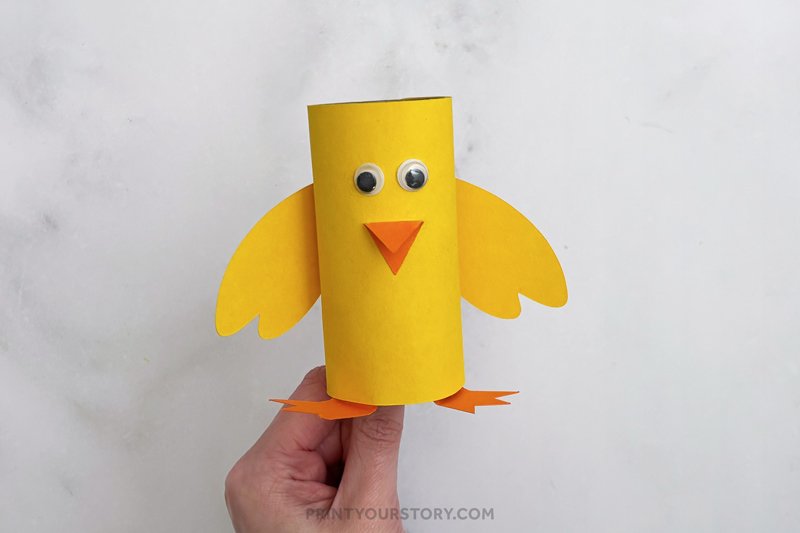
After that, stick on a pair of googly eyes right above the beak. They instantly bring your chick to life!
Step 4: Add a feather
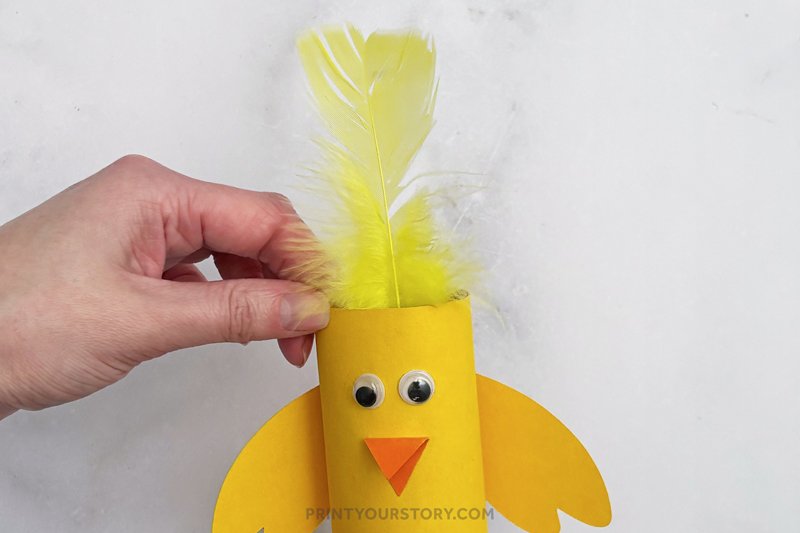
To finish things off, take a big yellow feather and glue it inside the top of the roll. It gives the chick a fluffy little tuft that adds a playful touch. Let the glue dry for a few minutes so everything stays in place.
And that’s it! Once it’s dry, your adorable paper roll chick is ready to show off.
Educational benefits of this craft
Crafts like this one aren’t just fun, they’re great for developing fine motor skills and creativity. Here’s what kids get to practice:
- Cutting: Tracing and cutting out shapes builds coordination
- Gluing and assembly: Following steps helps with sequencing and planning
- Creative expression: Decorating their chick with feathers, stickers, or drawings adds a personal touch
- Color recognition: Picking out yellow and orange, matching parts
If you’re using this in a preschool or classroom setting, you could even pair it with a spring storybook or a song about chicks and baby animals.
👉 Download the template here
The template is a helpful starting point if you want to jump right in or keep the shapes nice and consistent. But you can definitely get creative and cut your own wings, beak, and feet if you want to give your chick a more custom look.
Toilet Paper Roll Chick Template for Wings, Beak, Feet
US Letter Size Version
A4 Size Version
I’m always drawn to the simplest crafts. The ones you can sit down and start right away without needing anything fancy. This chick is the perfect example of that.
Toilet paper rolls are one of those things we all have lying around, and I love turning something plain into something cute and cheerful. It’s also the kind of craft that works well across ages. You can keep it super simple for toddlers or let older kids get creative with patterns, glitter, or accessories.
And of course, it makes a sweet little pair with the Toilet Paper Roll Bunny, which I shared earlier. You can easily turn this into a whole Easter or spring animal set.
Print the instructions for this craft
Use this printable version to follow along while crafting or to prep in advance.
Toilet Paper Roll Chick Craft
Turn a toilet paper roll into a fluffy yellow chick with paper wings, a folded beak, and a feather tuft, perfect for spring or Easter!
Materials
- Empty toilet paper roll
- Orange construction paper
- Craft feathers
- Paper and template PDF file
Tools
- Scissors
- Pencil for tracing
- Glue stick
- Printer
Instructions
- Wrap the roll. Cut a rectangle of yellow paper and wrap it around the toilet paper roll. Glue or tape it in place.
- Trace and cut the wings + feet. Use the printable template to trace two wings and two feet. The wings are basic rounded shapes and the feet are simple three-toe designs. Cut them out and glue them on: wings to the sides, feet sticking out from the bottom.
- Make the face. Cut a small triangle from orange paper, fold it in half, and glue just one side down so it sticks out like a 3D beak. Stick on the googly eyes.
- Add a feather. Glue a yellow feather inside the top of the roll to give your chick a fluffy little tuft.
Share or save for later!
If you made this chick craft, tag me on Instagram or Pinterest. I love seeing what you create.
Or pin it now and save it for your next rainy day activity or spring classroom project!