Penguin Popsicle Stick Craft (for Kids)
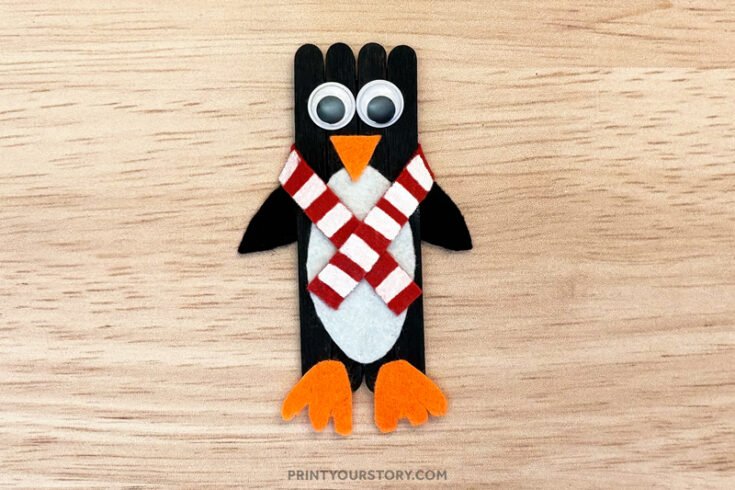
I’ve been leaning into cozy crafting lately, and this penguin popsicle stick craft totally fits the mood. It’s simple, cute, and uses materials we already had in our stash. Mainly felt, paint, googly eyes, and glue. This is one of those projects that comes together fast but looks so good when it’s done.
This would be a perfect craft to make with your kids. It’s quick enough to hold their attention, and they’ll love giving their penguin its own personality – especially when it comes to picking out scarf colors and googly eyes. You could even set up a little penguin-making station with pre-cut shapes if you want to keep it extra easy.
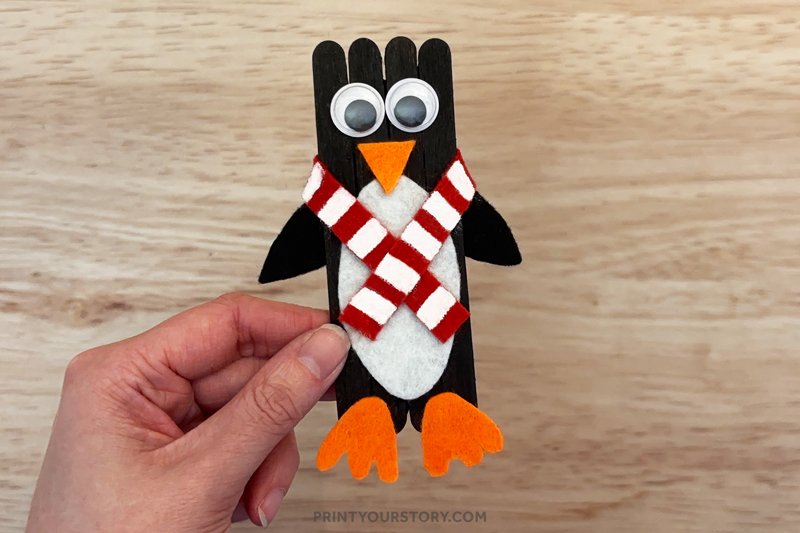
The striped scarf might be my favorite part. It adds just enough personality to make this little penguin feel festive without being overly complicated. You can definitely get creative with colors too. This is the kind of winter craft that’s great for relaxing, especially when you want something hands-on but low-stress.
You can prep some of the pieces ahead of time too. I like painting the popsicle sticks black the night before, so everything’s dry and ready to go when it’s time to craft. It makes the setup super smooth, which is always a win when you’re working with little hands.
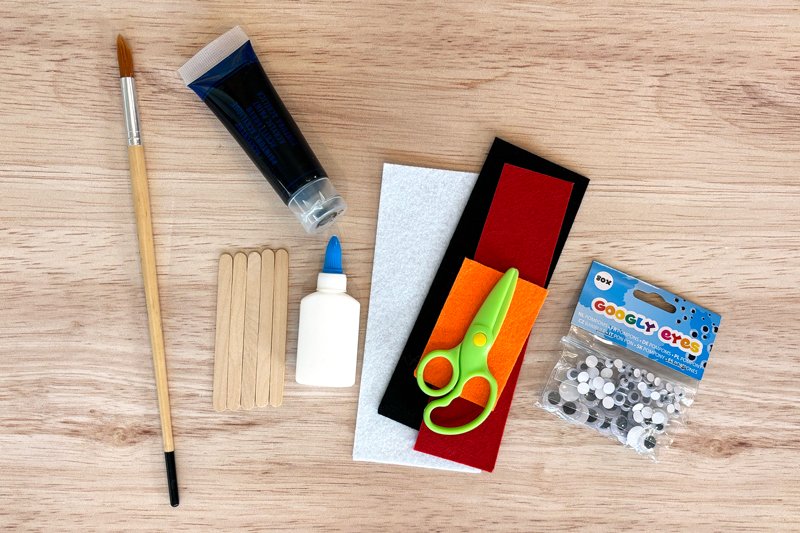
What You’ll Need
Step-by-Step Instructions: How to Make this Penguin Popsicle Stick Craft
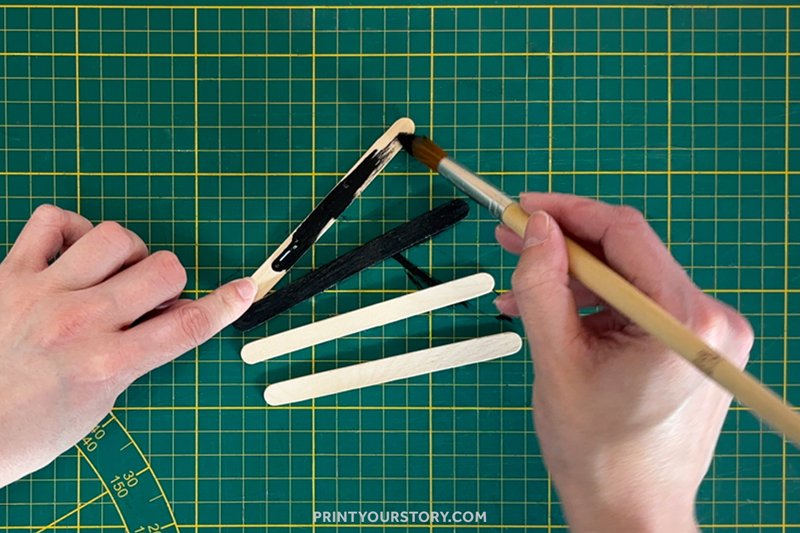
Step 1: Create the body
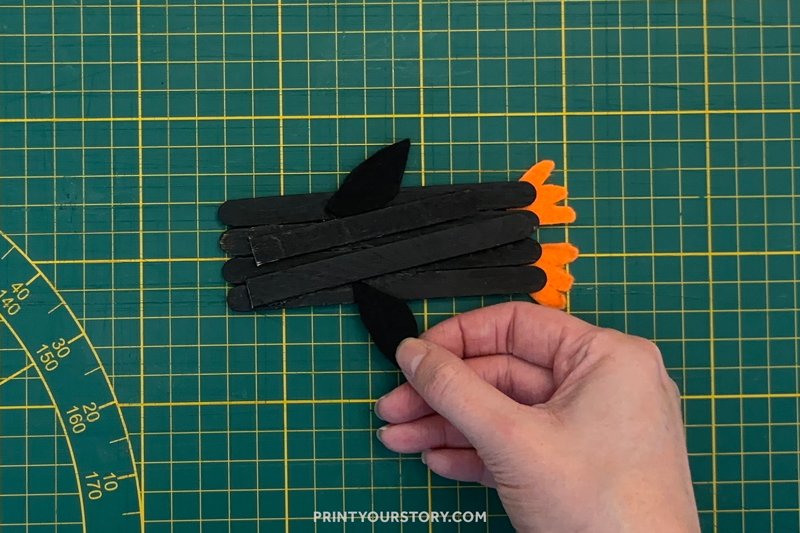
Paint four popsicle sticks black and let them dry completely. You can do this ahead of time if you’re prepping for a craft session with kids.
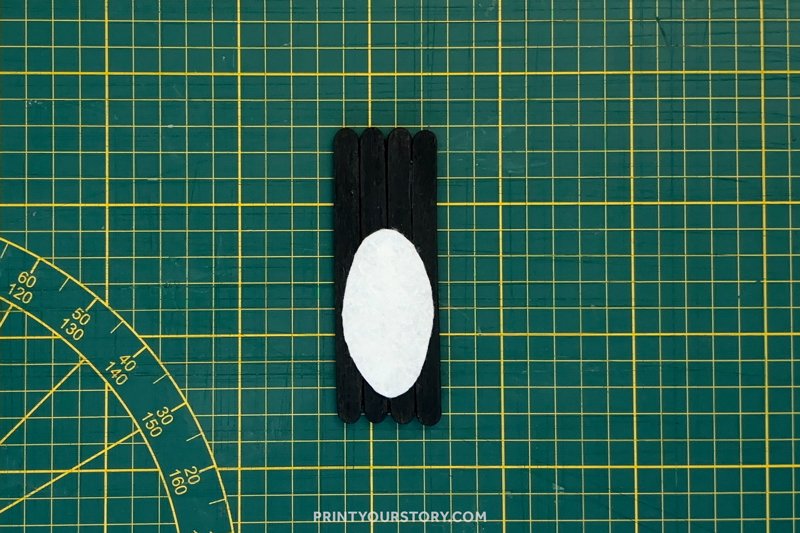
Once dry, line the sticks up vertically, side-by-side, to form the penguin’s body. To keep everything sturdy, glue two additional popsicle sticks diagonally across the back. This helps hold everything in place and keeps the front sticks from shifting. An adult can help with this step, especially if you’re using hot glue or stronger craft glue.
Let the glue dry fully before moving on to the next step.

Step 2: Add the belly, feet & wings
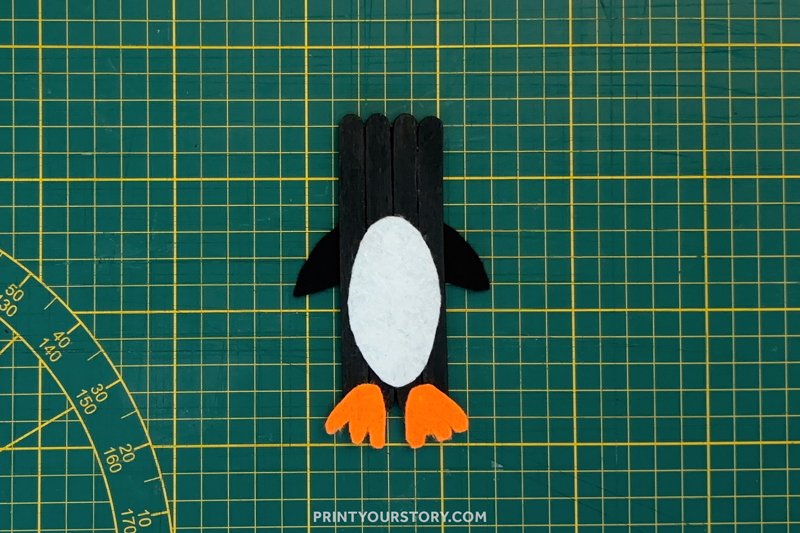
Cut a large oval from white felt for the belly and two webbed feet from orange felt. Glue the belly onto the front center of the body.
Then glue the feet to the bottom so they peek out just below the popsicle sticks.

Cut two wing shapes from black felt and glue them to the sides of the body. You can position them however you like – straight out, angled down, or even one up and one down for a silly touch.
Step 3: Make the face
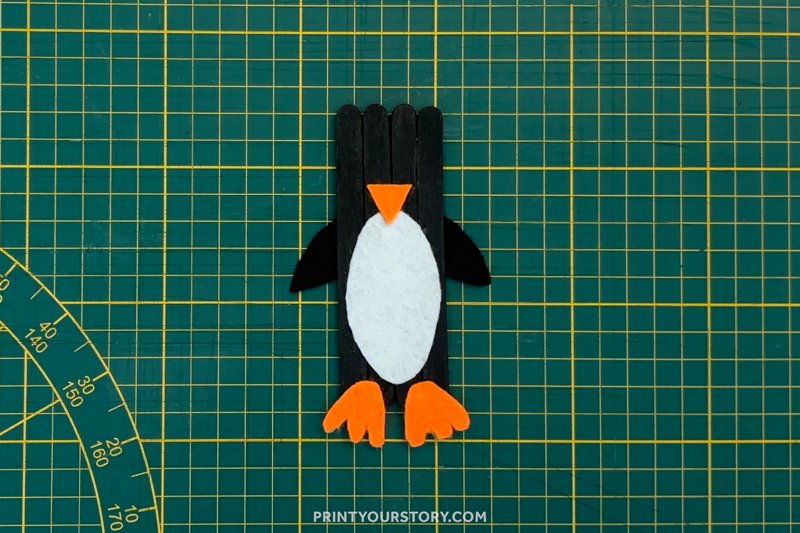
Add a small triangle of orange felt for the beak.
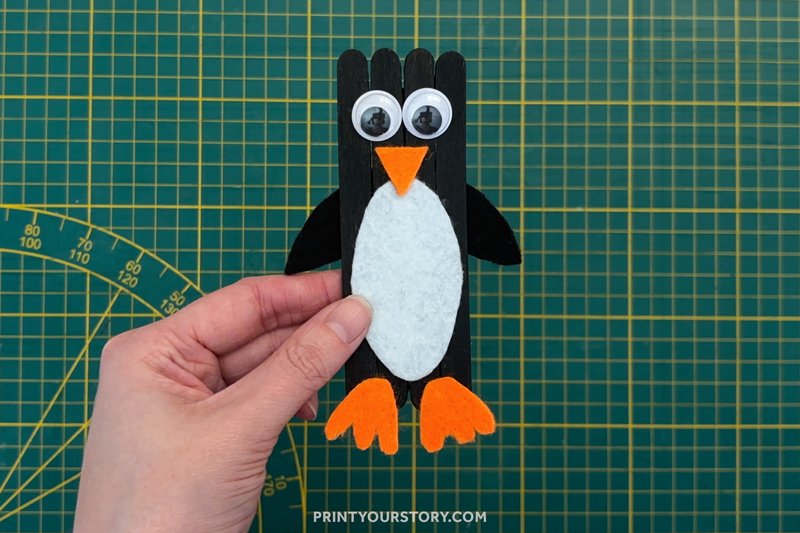
Then glue on two googly eyes near the top. This is where your kids can get creative with expression – tilting the eyes slightly or choosing oversized ones makes each penguin look a little different.
Step 4: Prepare the scarf
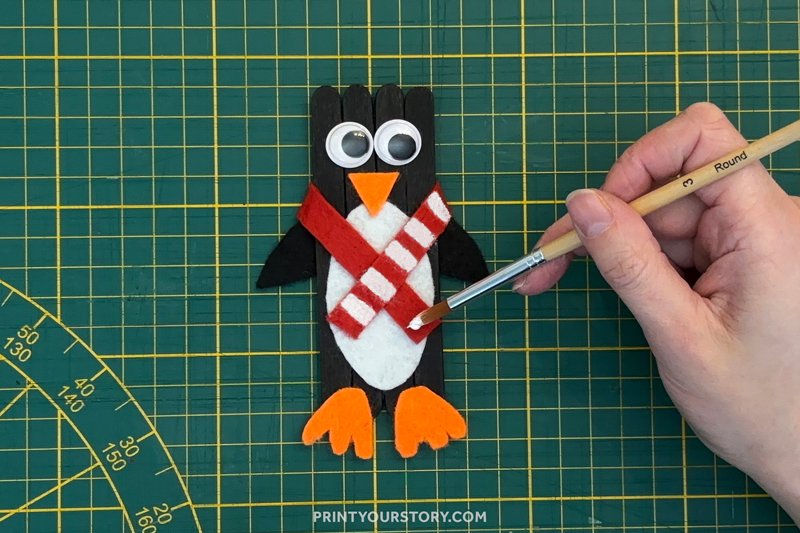
Cut a thin strip of red felt. Wrap it around the penguin’s neck and glue it in place so it stays secure.
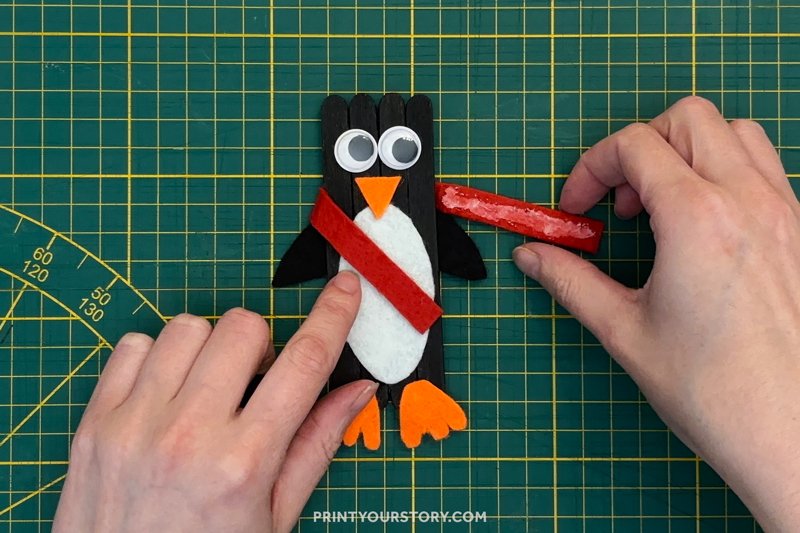
Optional: To make a striped scarf, either paint parts of the scarf white or cut small rectangles from white felt and glue them onto the red scarf before attaching it. This gives it that fun candy cane look, just like in the photo.

Penguin Popsicle Stick Craft (for Kids!)
This popsicle stick penguin craft is a fun and easy winter project made with popsicle sticks, felt, googly eyes, and glue. It’s perfect for a cozy afternoon and uses simple supplies you likely already have on hand.
Materials
- Popsicle sticks
- Black paint
- Felt: white, orange, black, red
- Googly eyes
- Glue stick
Tools
- Kid-friendly scissors
- Paint brush
Instructions
- Create the body. Paint four popsicle sticks black and let them dry completely.
- Add the belly & feet. Cut a large oval from white felt for the belly and two webbed feet from orange felt. Glue the belly onto the front center of the body, then glue the feet to the bottom so they peek out just below the popsicle sticks.
- Add the wings. Cut two wing shapes from black felt and glue one on each side of the penguin's body. You can position them slightly angled down to give the penguin a more natural shape.
- Make the face. Glue on two large googly eyes near the top of the penguin. Just below them, add a small triangle cut from orange felt to make the beak.
- Prepare the scarf. Cut a thin strip of red felt about 5 to 6 inches long. Wrap it around the penguin's neck and glue it in place so it stays secure.
Once dry, line the sticks up vertically, side-by-side, to form the penguin’s body. To keep everything sturdy, glue two additional popsicle sticks diagonally across the back. This helps hold everything in place and keeps the front sticks from shifting. An adult can help with this step, especially if you’re using hot glue or stronger craft glue.
Optional: To make a striped scarf, either paint parts of the scarf white or cut small rectangles from white felt and glue them onto the red scarf before attaching it. This gives it that fun candy cane look, just like in the photo.
This penguin makes a sweet little decoration for winter, and it’s a fun way to spend time crafting with your kids. You can add a ribbon loop to the back to hang it on the tree, or glue on a magnet and stick it on the fridge. If you have a few extra supplies, make a whole penguin family – each with its own color scarf and unique personality.
If you’re into seasonal crafts that don’t require a ton of prep, this one’s a winner. Let me know if you make it, I’d love to see your penguins!