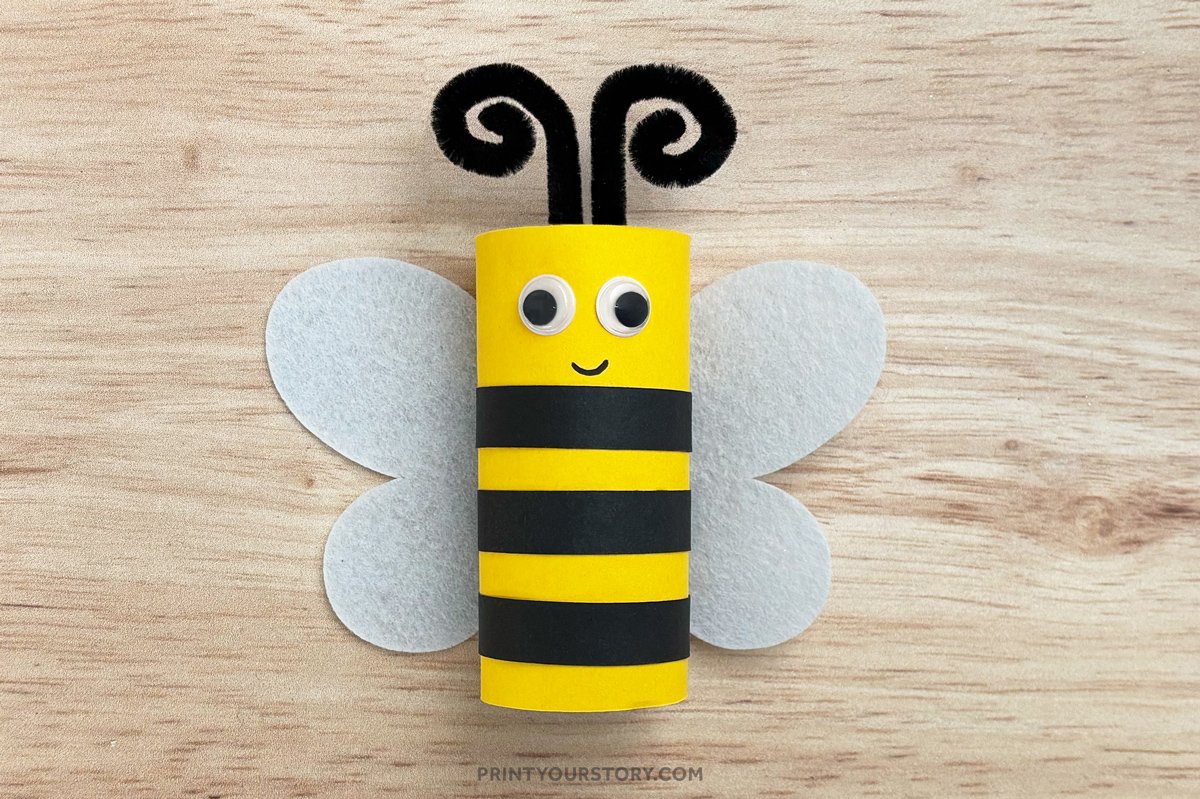
Bee Toilet Paper Roll Craft for Kids
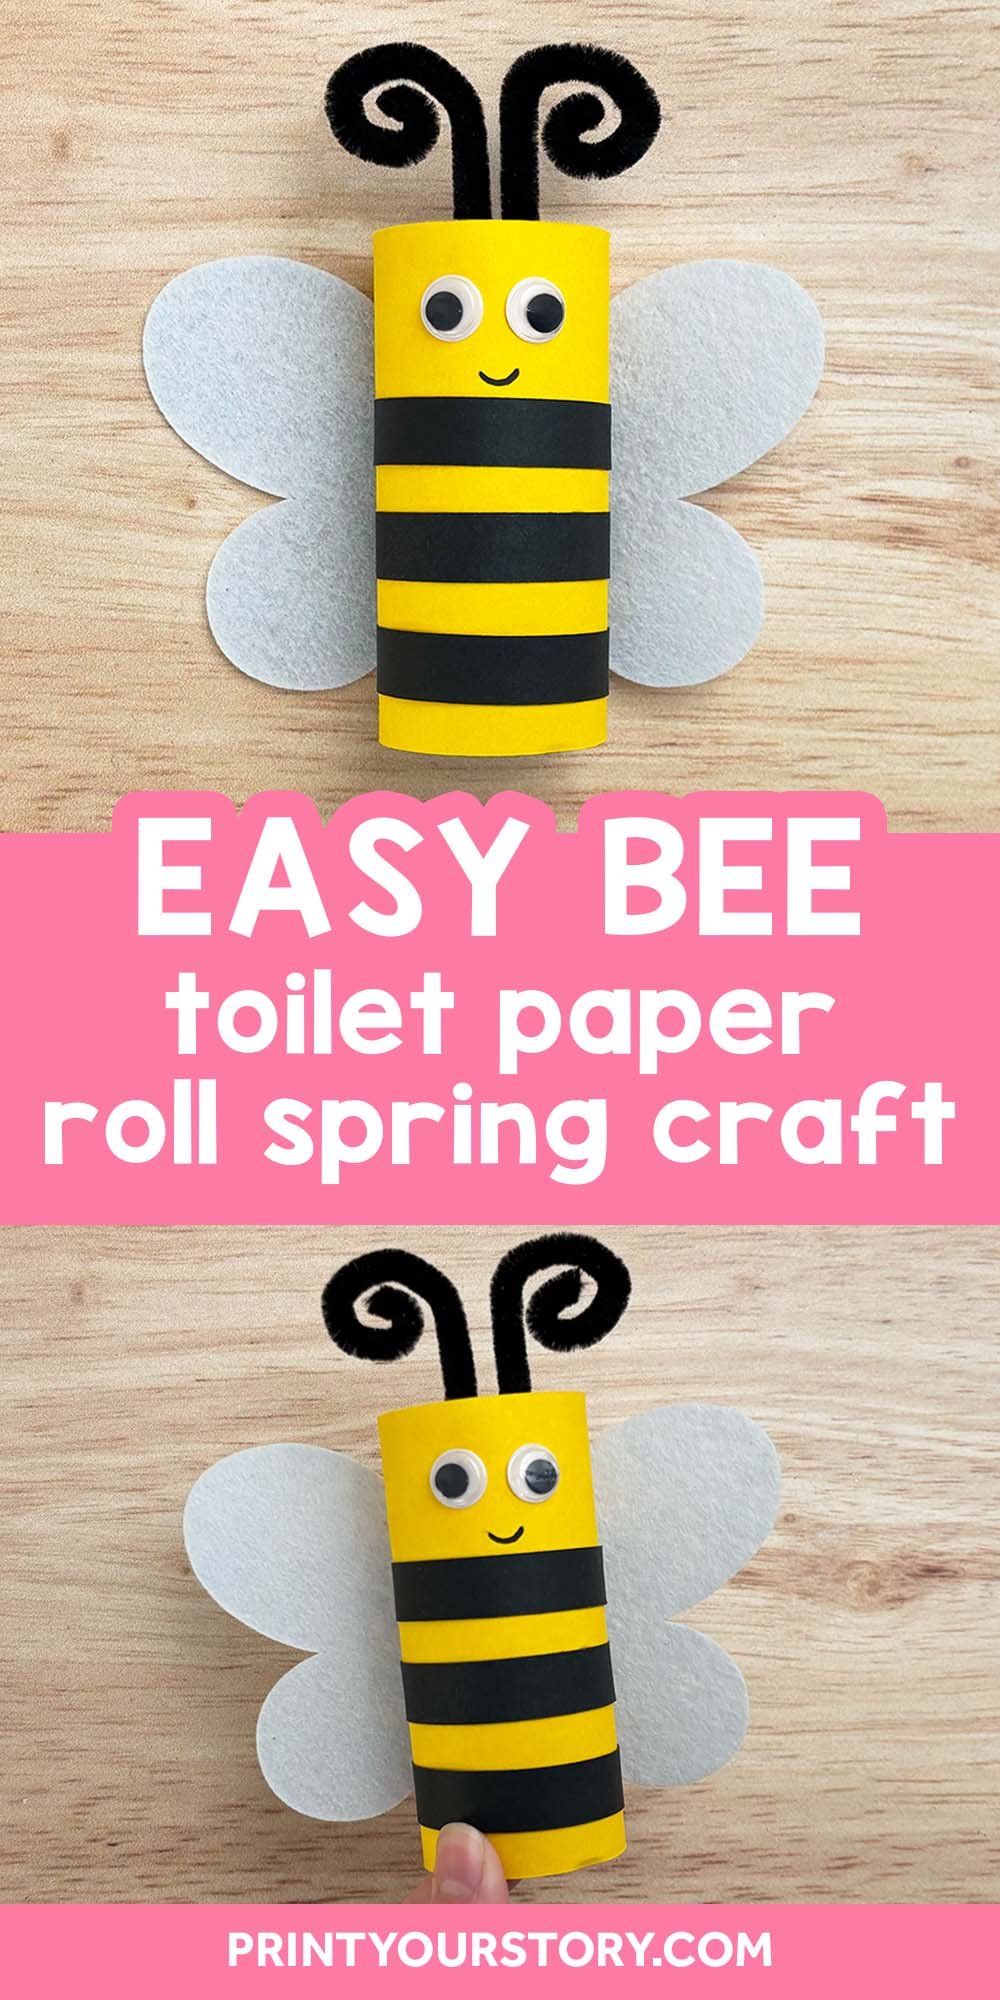
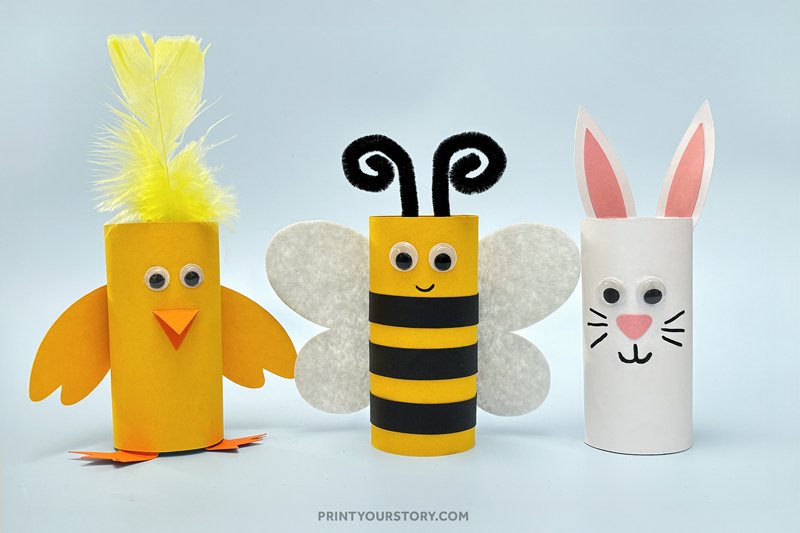
Spring is such a fun time for crafting! Everything is colorful, light, and buzzing with energy. If you’re looking for a cute and simple spring craft to try with your kids, this Bee Toilet Paper Roll Craft is perfect. It’s bright, cheerful, and easy enough for preschoolers or early elementary kids to make with a little help.
This craft is also a great way to reuse empty toilet paper rolls, which I always seem to have plenty of in the recycling bin. Add in some basic craft supplies like paper, paint, and googly eyes, and you’ve got everything you need for an afternoon of fun.
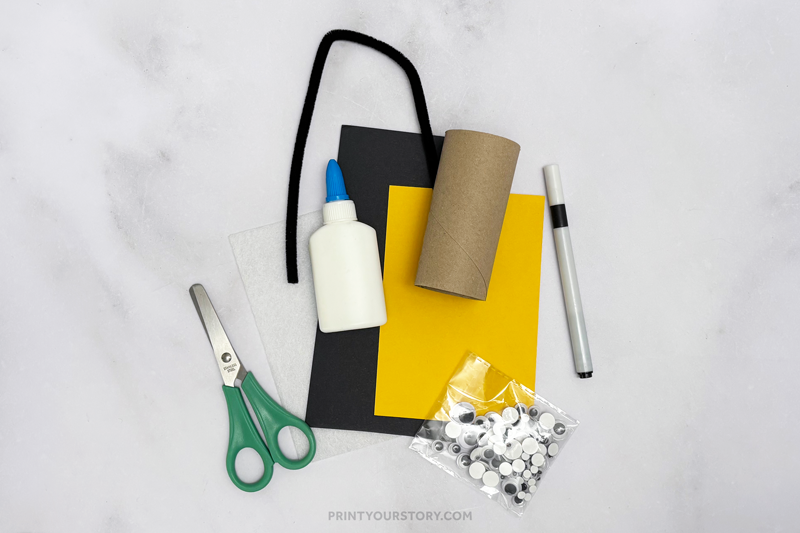
What you’ll need
How to make this Toilet Paper Roll Bee Craft
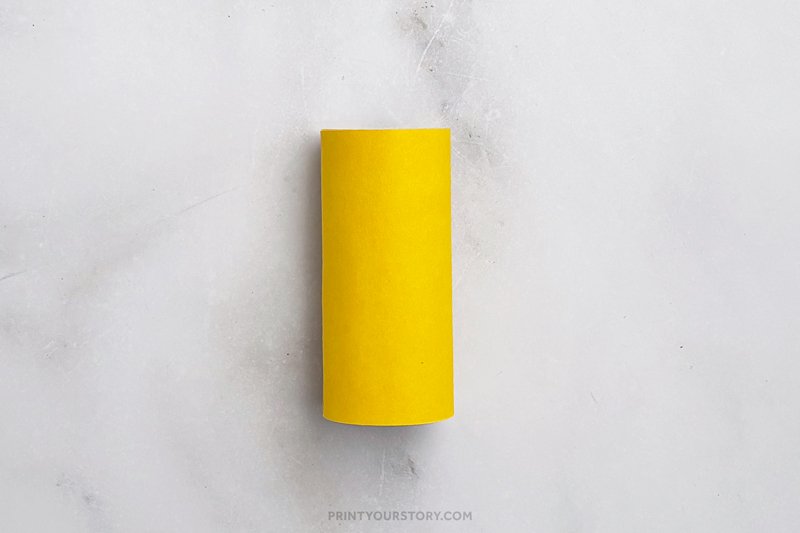
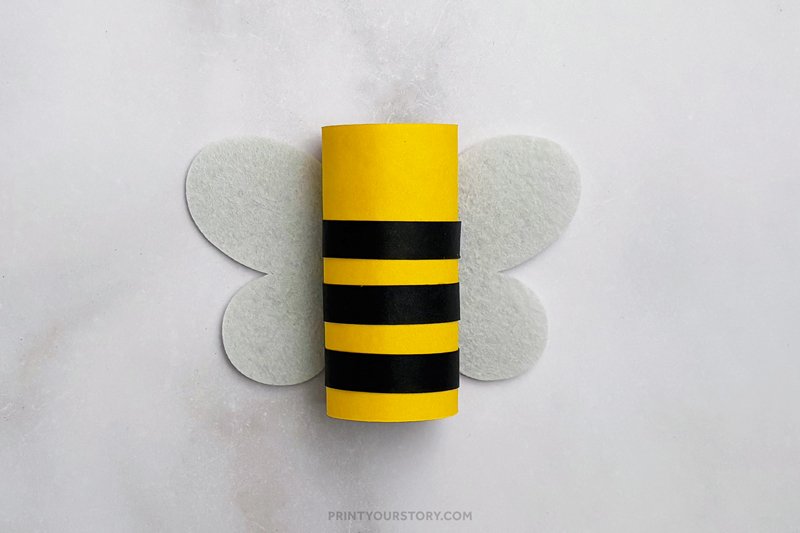
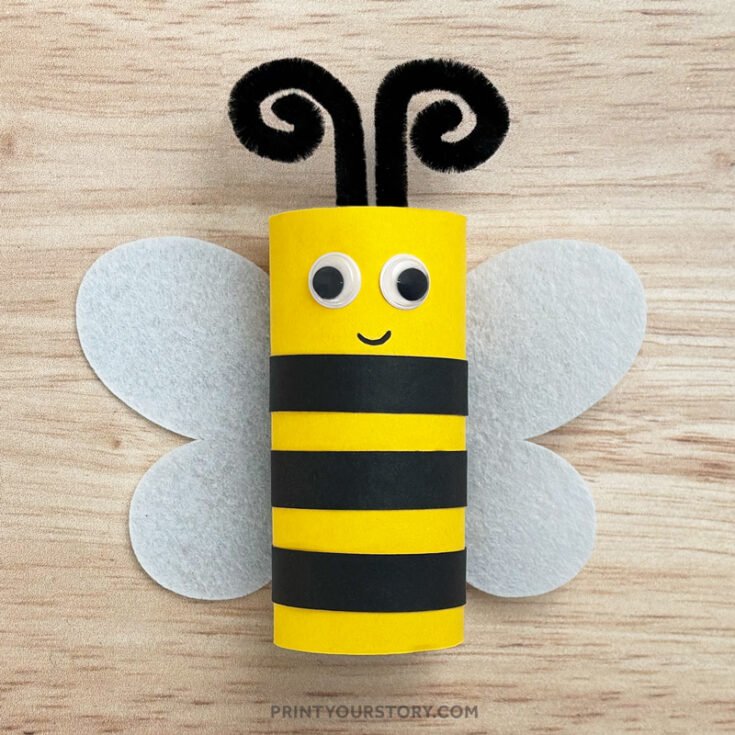
Step 1: Color the roll
Start by wrapping your toilet paper roll in yellow construction paper. Just cut a rectangle to fit around the roll and glue or tape it in place. If you prefer, you can also paint the roll yellow using acrylic paint, just be sure to let it dry completely before moving on.
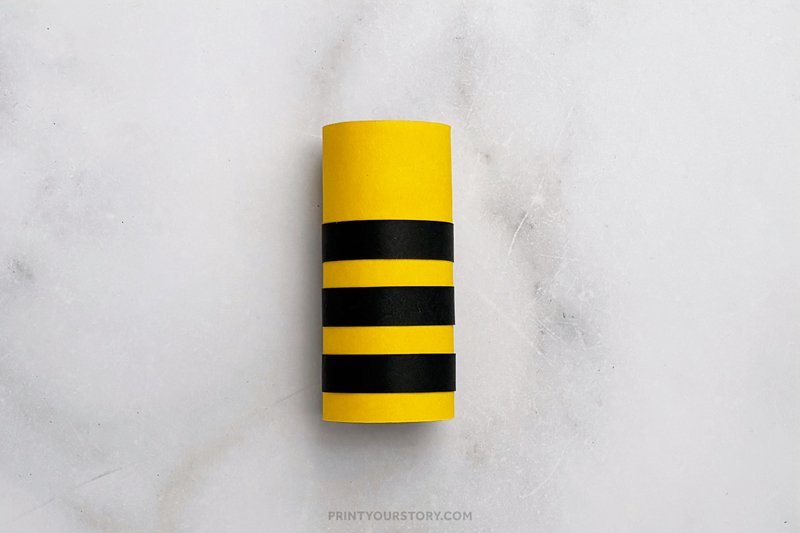
Step 2: Add the bee stripes
Cut a few strips of black cardstock to wrap around the roll like horizontal stripes. Two or three is plenty, and they don’t have to be perfectly even. Have fun with it! You can make them thick, thin, or even a little wavy for a playful look.
Optional: If you’d rather paint the stripes, just use a small brush and go for it. Neat lines are nice, but a messy look works too.
Step 3: Make and attach the wings
Cut out two wing shapes from white cardstock, thick paper, or felt, whatever you have on hand. I used felt for mine because I love the soft texture it adds to the finished bee, but paper works just as well if that’s what you prefer.
Once you’ve got your wings cut out, glue them to the back of the toilet paper roll so they stick out on either side. Let the glue dry completely before moving on to the next step.
Tip: Coffee filters or cupcake liners also work great if you want a different texture!
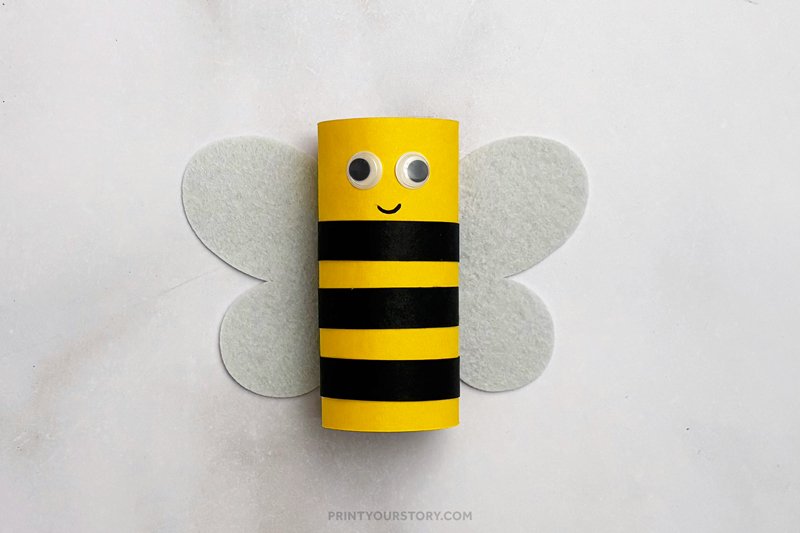
Step 4: Add the face
Glue on two googly eyes toward the top of the bee. Then, use a black marker to draw a sweet smile underneath the eyes. If your child wants, they can add blush cheeks, eyebrows, or even a tiny tongue.
Step 5: Attach the antennae
Cut a black pipe cleaner in half. Curl the top of each piece into a loop or swirl, and glue or tape them to the inside of the roll so they pop out like antennae. This is such a fun detail that gives your bee a bit of personality!
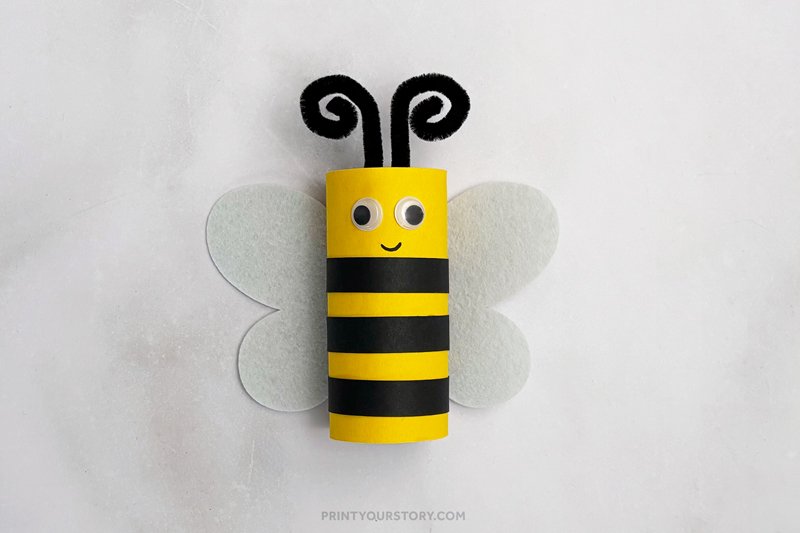
This craft turned out so bright and cheerful. I love how it came together. The little antennae are definitely my favorite part. They bounce a bit when you move it, and it just makes the whole thing feel extra fun.
Tips & Variations
- Add glitter or stickers for extra sparkle
- Punch a hole in the top and hang your bee with string for a spring mobile
Crafting Tips
- If you’re working with younger kids, pre-cut the wings and help with the pipe cleaner step
- This makes a great group activity, just prep a few steps in advance
- Want less mess? Use yellow and black paper strips instead of paint
- Display them on a windowsill or classroom wall for a cheerful spring scene
Educational Bonus
This bee craft also opens the door to learning opportunities! Try pairing it with a quick lesson or read-aloud about pollination, bees in nature, or the role they play in helping flowers grow. Kids will love crafting their own bee while learning about how important these little insects really are.
Print the instructions for this craft
Use this printable version to follow along while crafting or to prep in advance.
Toilet Paper Roll Bee Craft
This cheerful little bee is an easy spring craft made from a toilet paper roll, perfect for a fun and simple afternoon activity.
Materials
- Empty toilet paper roll
- Yellow paint or construction paper
- White cardstock or sturdy paper or felt (for the wings)
- Black paint or construction paper
- Googly eyes
- Black pipe cleaner
Tools
- Black pen or marker for the mouth
- Scissors
- Glue
- Paintbrush (optional)
Instructions
Step 1: Color the roll. Start by wrapping your toilet paper roll in yellow construction paper.
Step 2: Add the bee stripes. Cut a few strips of black cardstock to wrap around the roll like horizontal stripes
Step 3: Make and attach the wings. Cut out two wing shapes from white cardstock, thick paper, or felt. These will be your bee’s wings. Glue them to the back of the roll.
Step 4: Add the face. Glue on two googly eyes toward the top of the bee. Then, use a black marker to draw a sweet smile underneath the eyes.
Step 5: Attach the antennae. Cut a black pipe cleaner in half. Curl the top of each piece into a loop or swirl, and glue or tape them to the inside of the roll so they pop out like antennae.
Share or save for later!
If you made this craft, tag me on Instagram or Pinterest. I love seeing what you create.