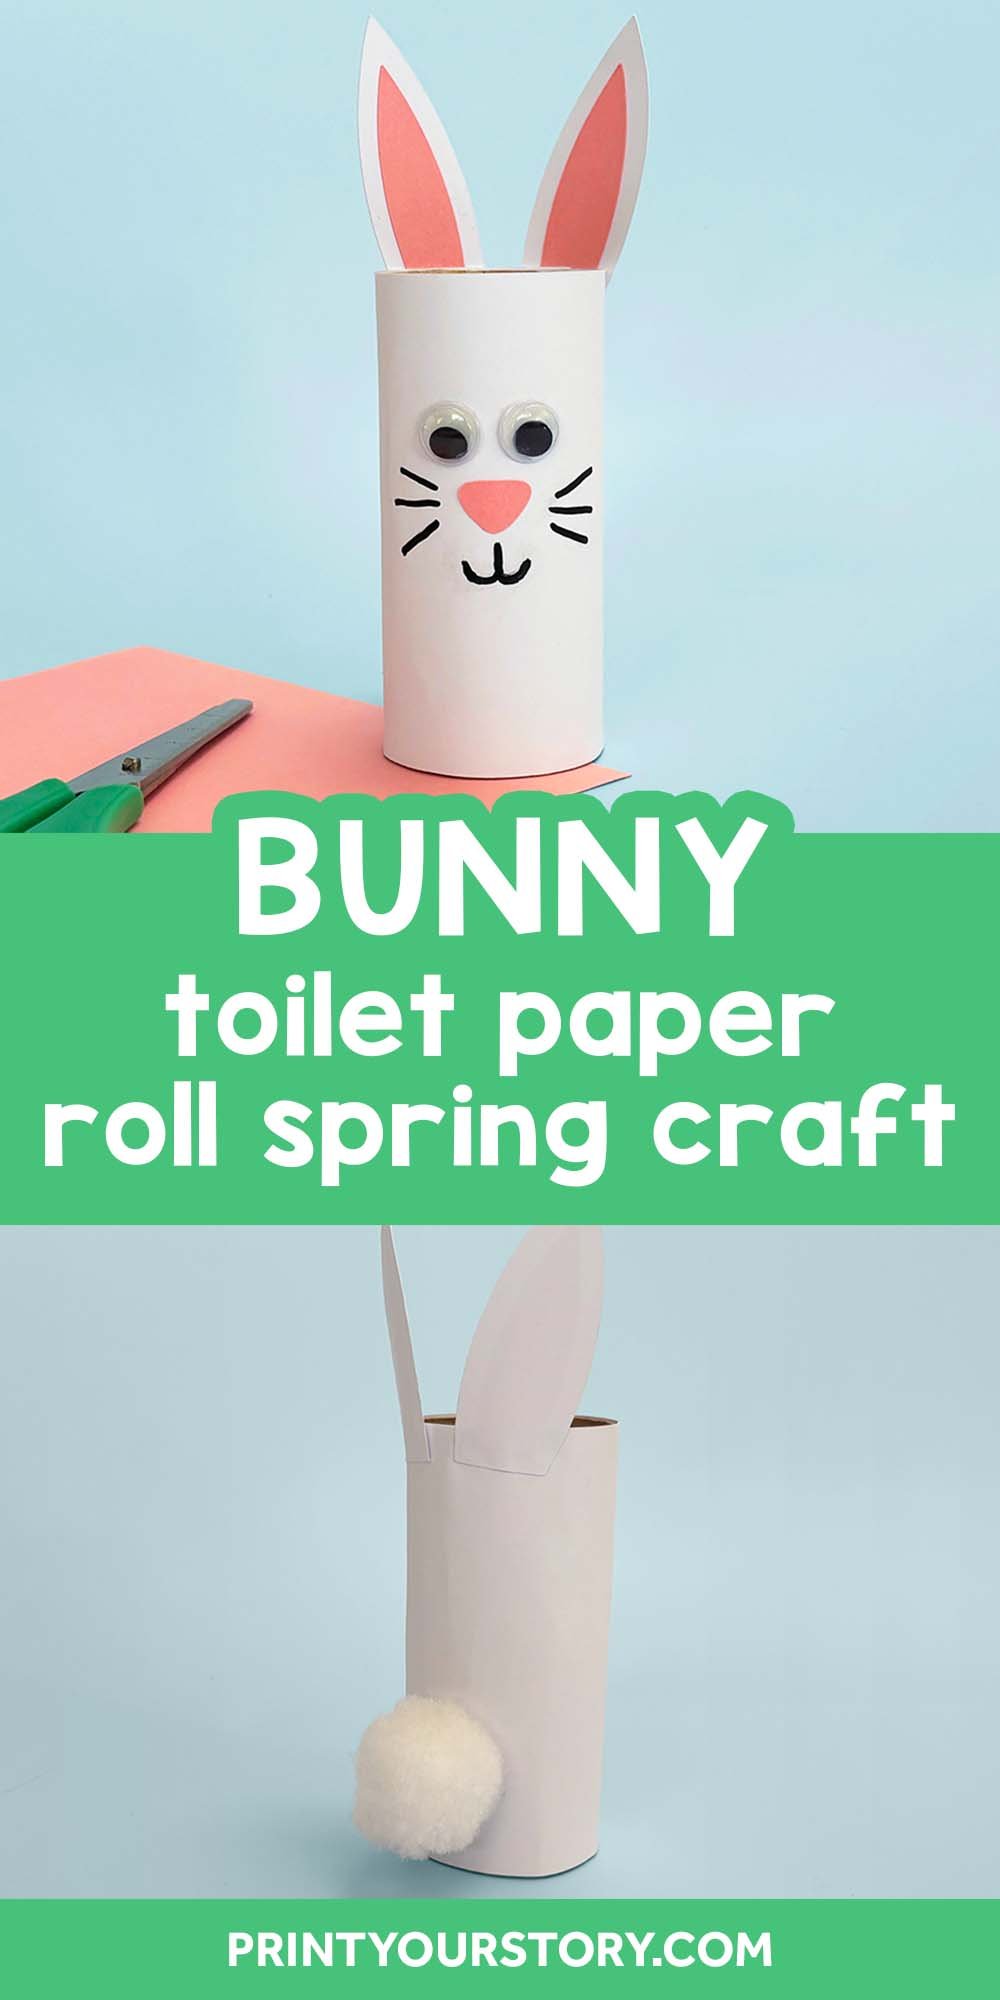
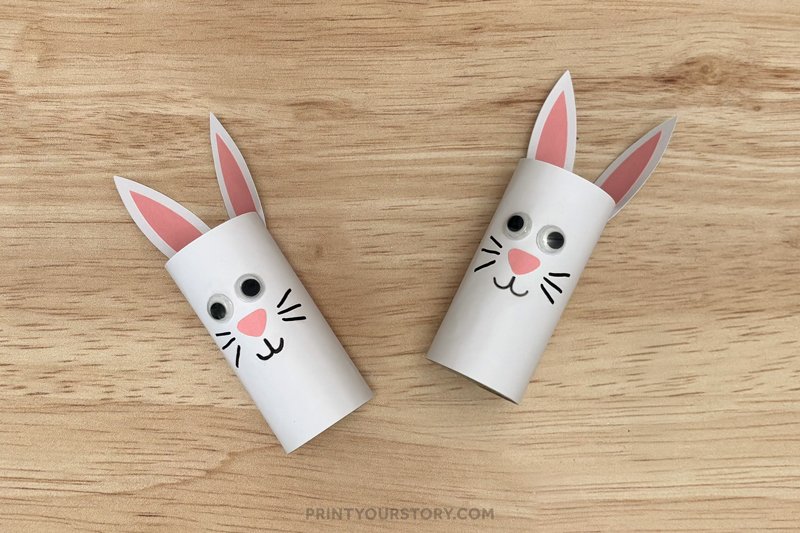
Toilet Paper Roll Bunny Craft (Easy Spring & Easter Activity)
Spring crafts are always some of my favorites. They’re usually bright, simple, and full of charm. This toilet paper roll bunny craft turned out so sweet and only took about fifteen minutes to make. It’s a great low-prep activity, and the best part is you probably already have everything you need on hand.
I love using toilet paper rolls in crafts because they’re easy to work with and a fun way to reuse what you already have at home. This bunny is a great match with my Toilet Paper Roll Chick Craft if you want to create a little springtime set.
What you’ll need
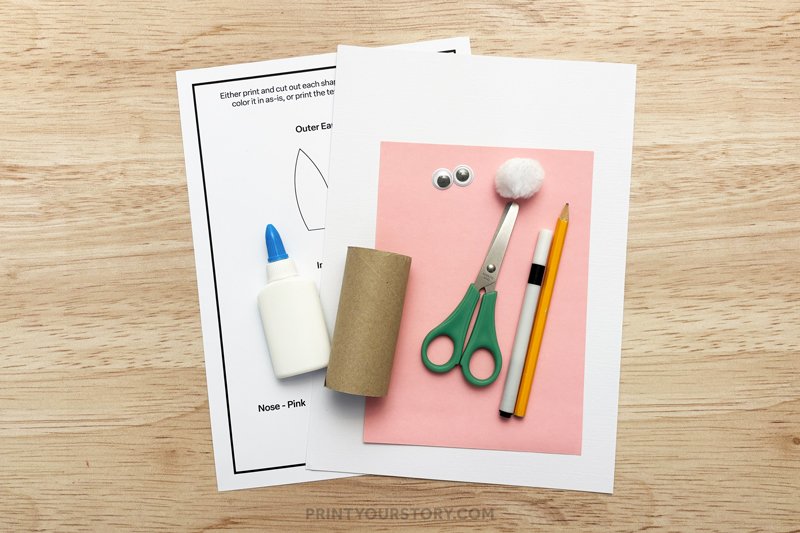
What’s included in the free template
- Large bunny ears
- Smaller inner ears
- Small heart and triangle shape (for the bunny’s nose – pick the one you like most)
Each shape is outlined clearly so you can print it, cut it out, and use it as a tracing guide on colored paper.
Or you can print the template on regular (colored) printer paper and use it again and again!
How to make this Toilet Paper Roll Bunny Craft
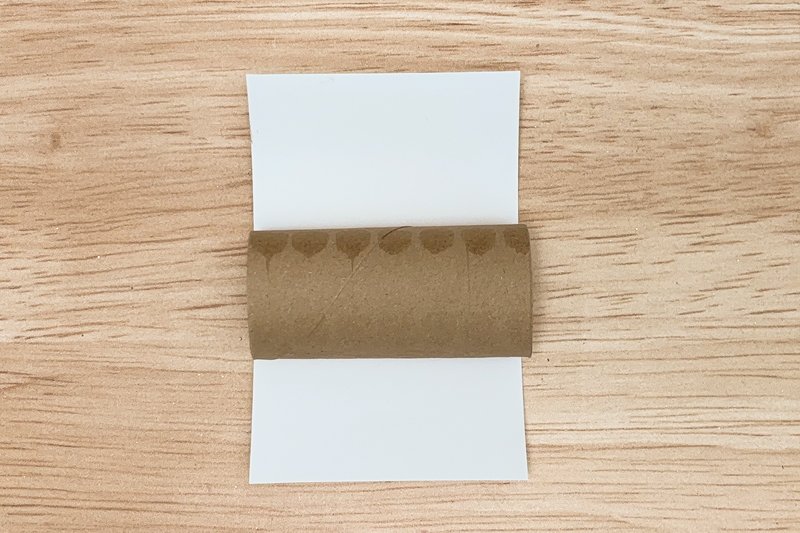
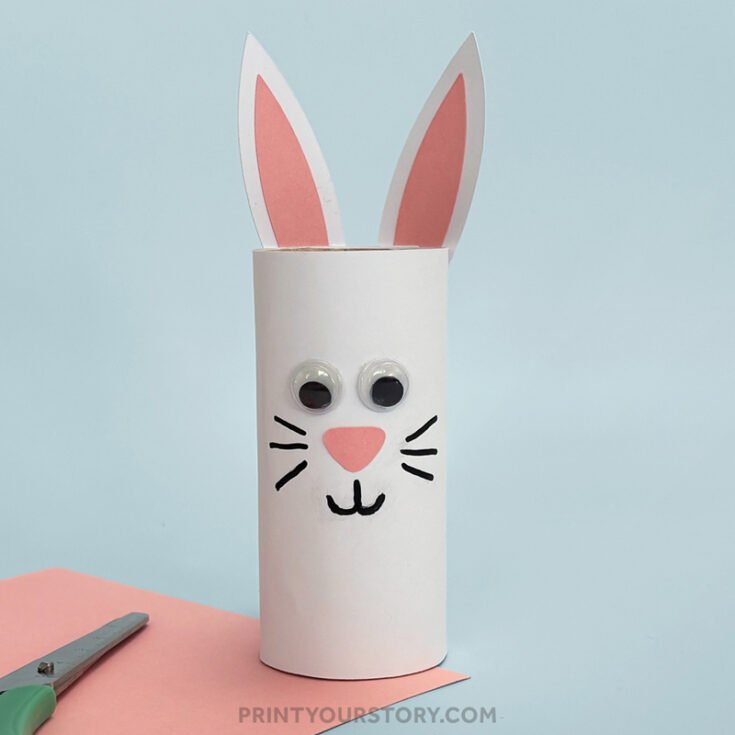
Step 1: Color the roll
You can either paint the toilet paper roll white and let it dry completely, or wrap it in a piece of white paper. If you’re using paper, just glue or tape it in place and trim any extra from the edges for a neat look.
Step 2: Make the ears
Print and cut out the bunny ear template pieces. Use the larger shapes to trace two ears onto white paper, and the smaller shapes to trace two inner ears onto pink paper.
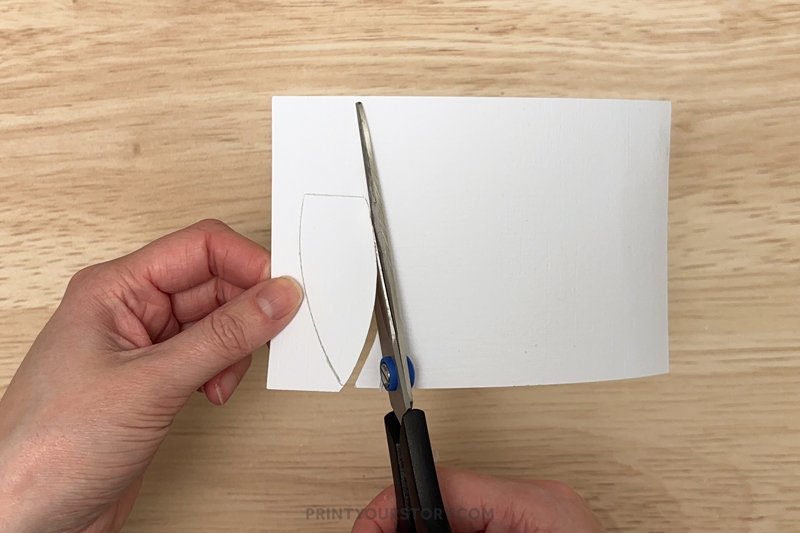
Cut everything out, then glue each pink inner ear onto a white ear.
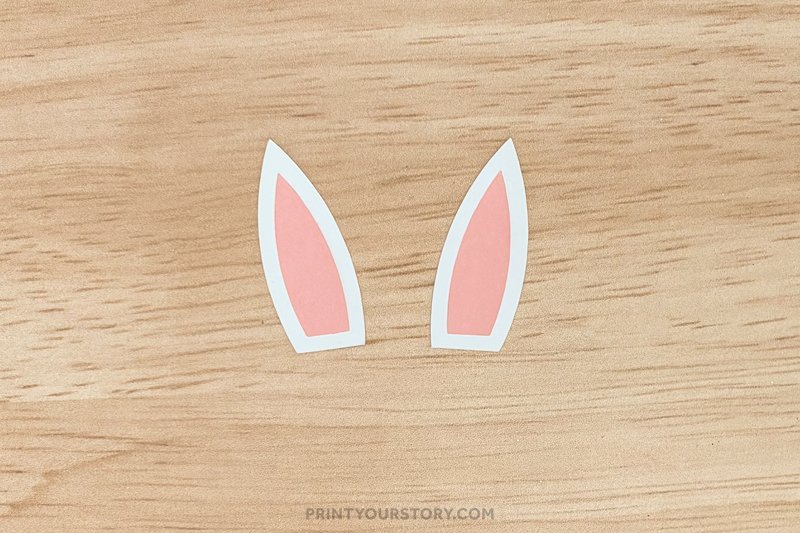
Once they’re dry, attach the finished ears to the back edge of the toilet paper roll so they stick up like bunny ears.

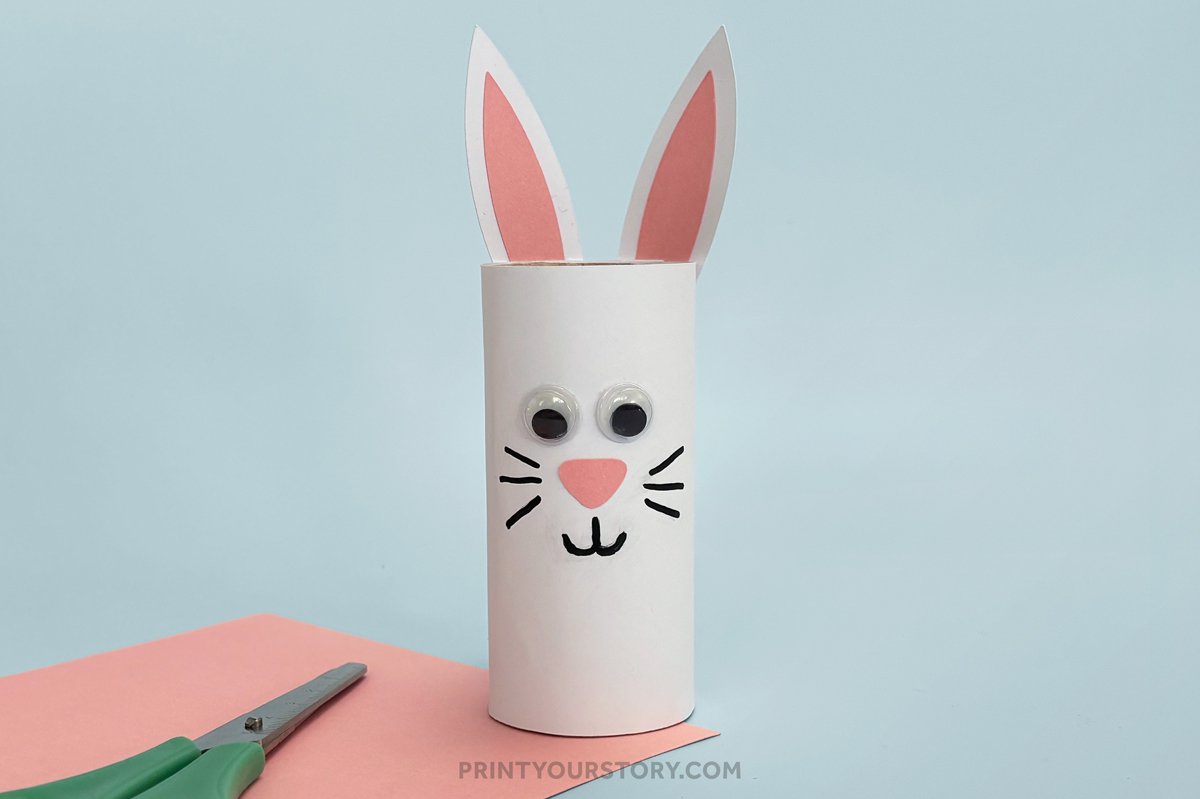
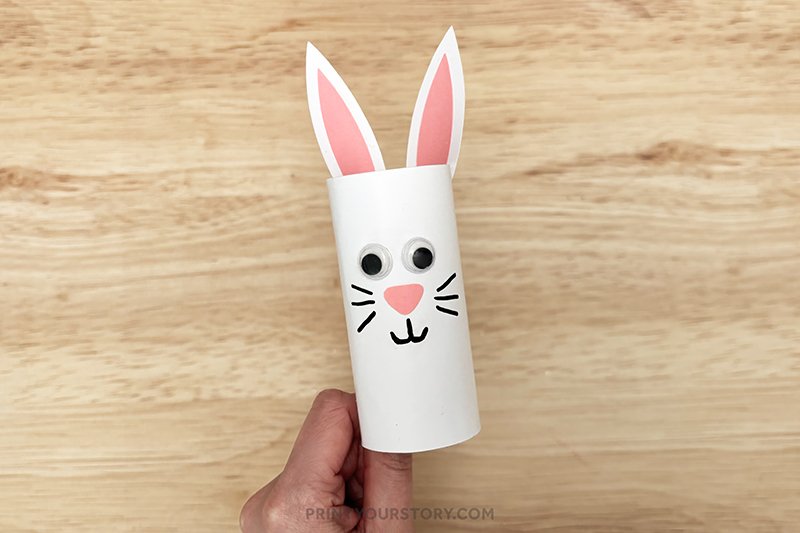
Step 3: Add the face
Glue the googly eyes near the top of the paper roll, spacing them evenly so your bunny looks nice and balanced.
For the nose, you’ve got a couple of options. You can cut a small triangle from pink paper if you want a simple, handmade look, or use one of the two cute nose shapes included in the printable template. Either way, glue the nose just below the eyes.
Then, take a pen or marker and draw on some whiskers, starting from each side of the nose and flicking outward with quick strokes. It’s a small detail, but it really brings the face to life!
Don’t forget to add a little mouth right underneath the nose.
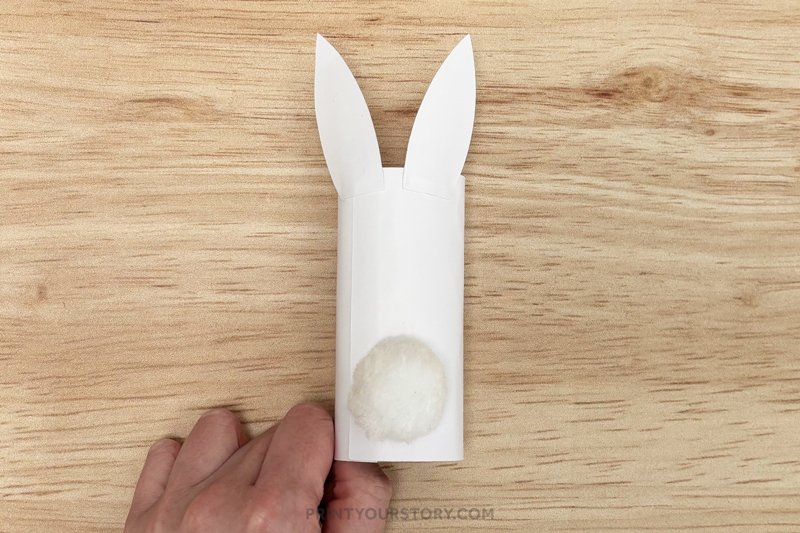
Step 4: Attach the tail
Flip the roll around and glue a cotton ball to the back for a fluffy tail.
Step 5: Decorate (optional)
You can add a little bow, stickers, or even give your bunny some drawn-on eyelashes. Totally up to you!
Tips & variations
- Use brown or gray paper for a different bunny color
- Add a name tag and use it as a place card for Easter brunch
👉 Download the template for ears and nose
The template is there to make things a little easier, especially if you want a quick start or consistent shapes. But feel free to get creative and cut your own ears and nose if you’d rather customize the look!
No signup is needed to download, just a quick captcha to keep the files safe.
US Letter Size Version
A4 Size Version
A Quick Note on Sharing this file
If you love this template and want to share it with friends, teachers, or fellow crafters, I’d be so happy! Please just share the link to this blog post instead of sending the file directly. It helps support my site and allows me to keep creating free crafts for everyone to enjoy.
Thanks for supporting my little corner of the internet!
If you’re putting together a spring craft week or prepping for Easter, this bunny pairs so well with my Toilet Paper Roll Chick. They look adorable together on a shelf or as part of a handmade spring scene.
Print the instructions for this craft
Use this printable version to follow along while crafting or to prep in advance.
Toilet Paper Roll Bunny Craft
This easy bunny craft uses a toilet paper roll, paper ears and nose, and a pom-pom tail to create a sweet springtime bunny in minutes.
Materials
- Empty toilet paper roll
- White paper or white paint (to wrap the roll)
- Pink and white paper (for the ears and nose)
- Googly eyes
- Cotton ball or pom-pom (for the tail)
- Paper and template PDF file
Tools
- Black pen or marker for the whiskers
- Pencil for tracing
- Scissors
- Glue stick
- Printer
Instructions
- Color the roll. You can either paint the toilet paper roll white and let it dry completely, or wrap it in a piece of white paper. If you’re using paper, just glue or tape it in place and trim any extra from the edges for a neat look.
- Make the ears. Print and cut out the bunny ear template pieces. Use the larger shapes to trace two ears onto white paper, and the smaller shapes to trace two inner ears onto pink paper.
Cut everything out, then glue each pink inner ear onto a white ear. Once they’re dry, attach the finished ears to the back edge of the toilet paper roll so they stick up like bunny ears. - Add the face. Glue on the googly eyes near the top of the roll. For the nose, you can either cut a small triangle from pink paper or use one of the two nose shapes included in the template. Glue it just below the eyes. Draw on whiskers with a pen or marker.
- Attach the tail. Flip the roll around and glue a cotton ball to the back for a fluffy tail.
- Decorate (optional). You can add a little bow, stickers, or even give your bunny some drawn-on eyelashes. Totally up to you!
Share or save for later!
If you made this bunny craft, tag me on Instagram or Pinterest. I love seeing what you create.
Or pin it now and save it for your next rainy day activity or spring classroom project!