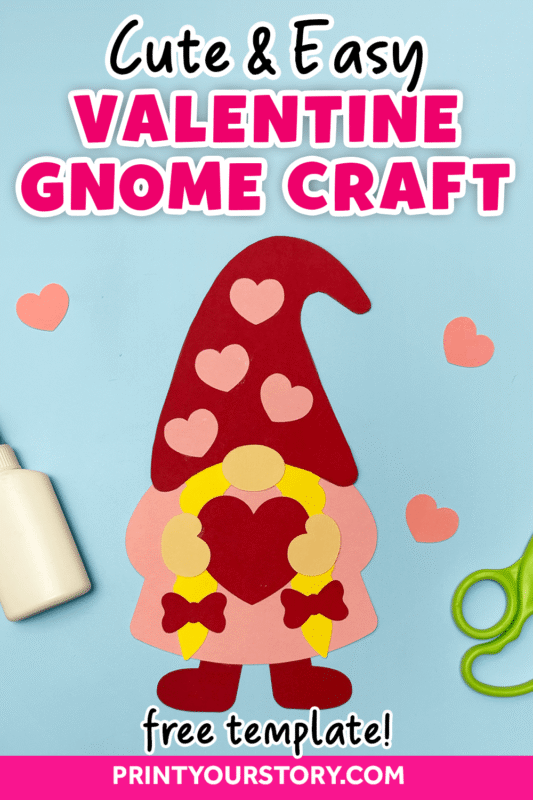
Valentine Gnome Craft for Kids (with Printable Templates!)
If you’re looking for a low-prep, hands-on activity to do together this February, this Valentine gnome craft for kids is such a fun option. It’s simple to set up, and you can make it as easy or detailed as you want depending on your child’s age.
There’s a full-color version for quick cut-and-paste, or a line-art version that’s perfect for tracing and building your own custom paper gnome. Either way, it’s the kind of project that feels festive without turning into a huge mess, which is always a win around here.

Printable Gnome Templates: Pick Your Favorite Way to Craft
This Valentine gnome comes with three printable versions, all included in the free download. You can use one or mix and match:
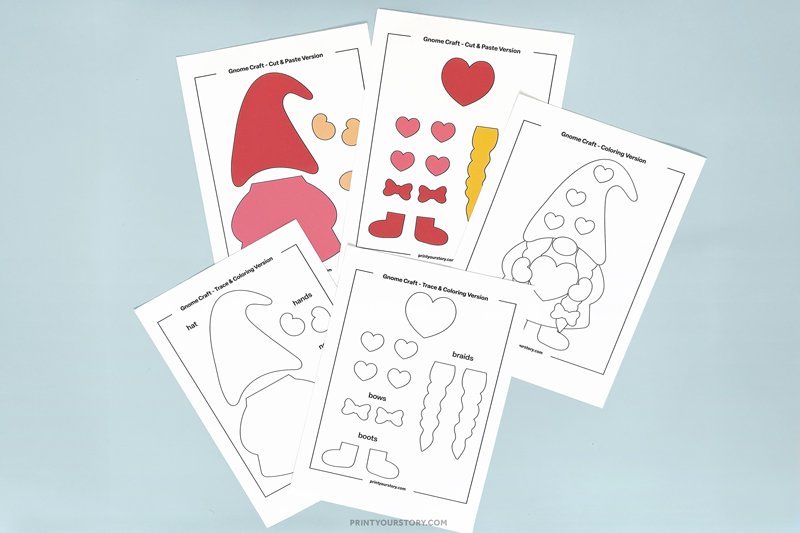
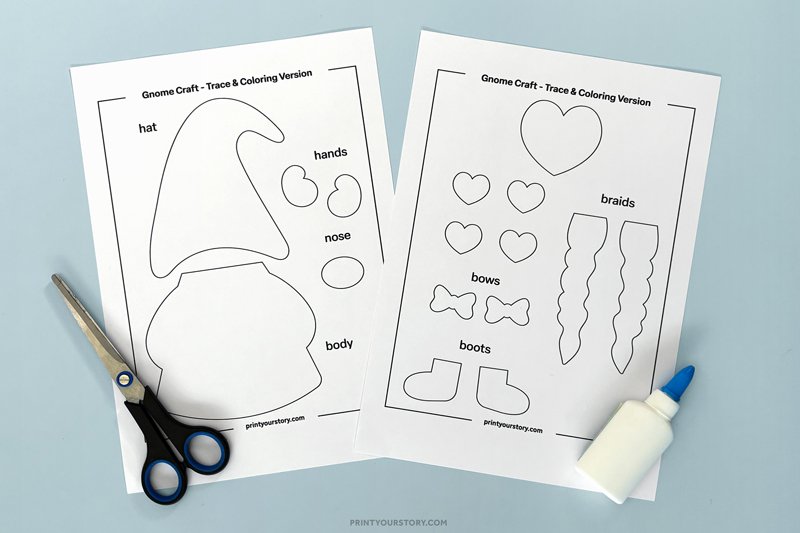
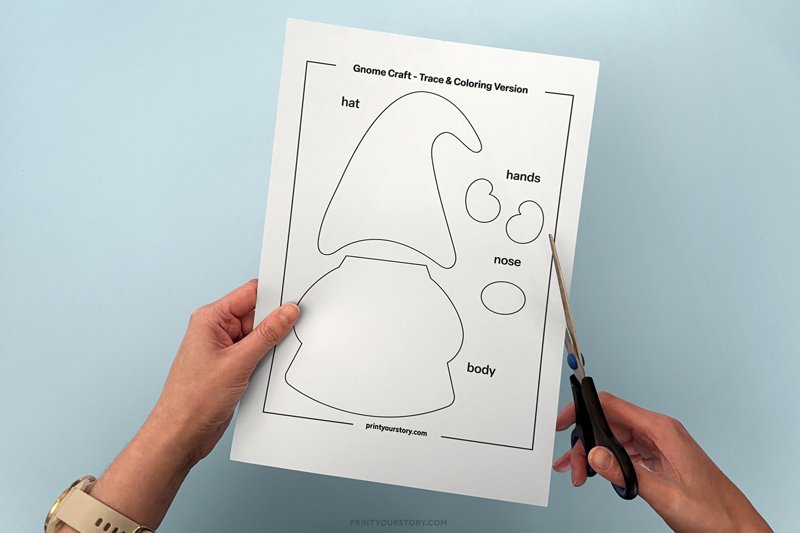
1. Trace & Coloring Version (great for adult crafters or older kids)
This version includes each gnome piece as a simple outline, so you can:
- Trace them onto colored paper
- Or color them in before cutting
It’s my personal favorite because it gives you more creative freedom. You can choose your paper textures, colors, and even add patterns if you want to dress her up a bit.
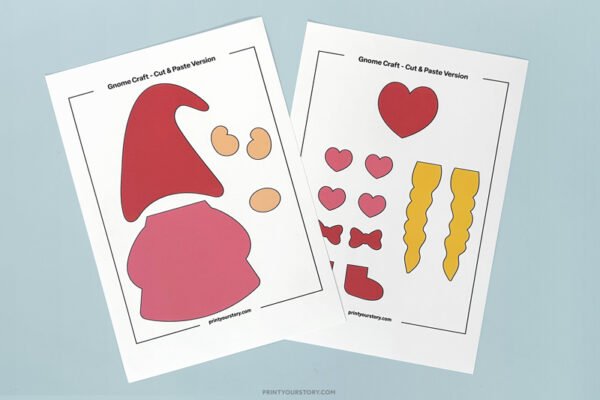
2. Full-Color Cut & Paste Version (perfect for younger kids)
This one includes all the gnome parts already colored in. Just print, cut, and glue. It’s a great option for younger crafters who want to get straight to the fun part. No need for coloring or tracing, the pieces are ready to go!

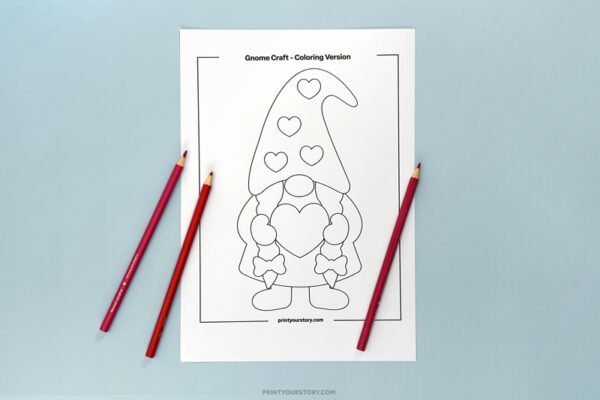
3. Coloring Sheet Gnome
There’s also a full coloring page featuring the finished gnome design. This is fun if your child just wants to color a Valentine gnome without doing the cutting and pasting.

What You’ll Need
Instructions: How to Make this Valentine Gnome Craft for Kids
Here’s how I made mine using the Trace & Coloring Version, but feel free to use the other versions if they work better for your setup!
- Use the Full-Color Cut & Paste Version if you’re short on time or working with a younger child who just wants to cut and glue.
- Try the Coloring Sheet Gnome if they’re in a coloring mood and just want to decorate the full design.
You really can’t go wrong, all the versions end up looking adorable!
Step 1: Print your template
If you’re tracing, print the 2-page Trace & Coloring Version. It has each gnome part outlined so you can cut or trace them separately. If you’re using one of the other options, print the Full-Color Cut & Paste Version or the Gnome Coloring Sheet instead.
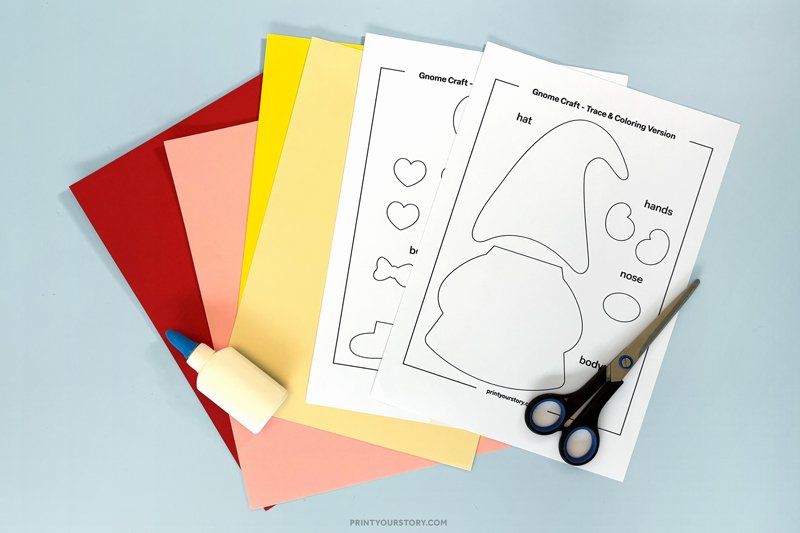
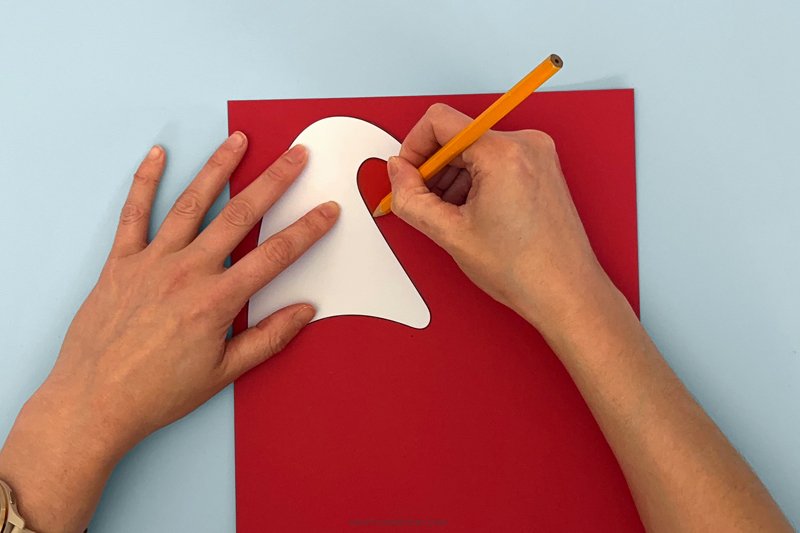
Step 2: Choose your paper (for tracing version)
Pick out your paper colors for each part. I used:
- Red for the hat, boots, heart and bows
- Pink for the dress
- Cream for the hands and nose
- Yellow for the braids
Let kids pick their own colors too, it’s fun to see the variations!
Step 3: Cut and trace the pieces
If you’re using the Trace & Coloring Version, start by cutting out the gnome pieces from the printed template. Then use each one as a stencil to trace onto your colored paper. This gives you the freedom to choose your own colors, patterns, or textures and it’s great for older kids or adults who enjoy a bit more crafting time.
For younger crafters, you can skip the tracing and use the Full-Color Cut & Paste Version instead. The pieces are already colored in, so all they need to do is cut and glue. Super simple and satisfying!
Step 4: Cut out all your pieces
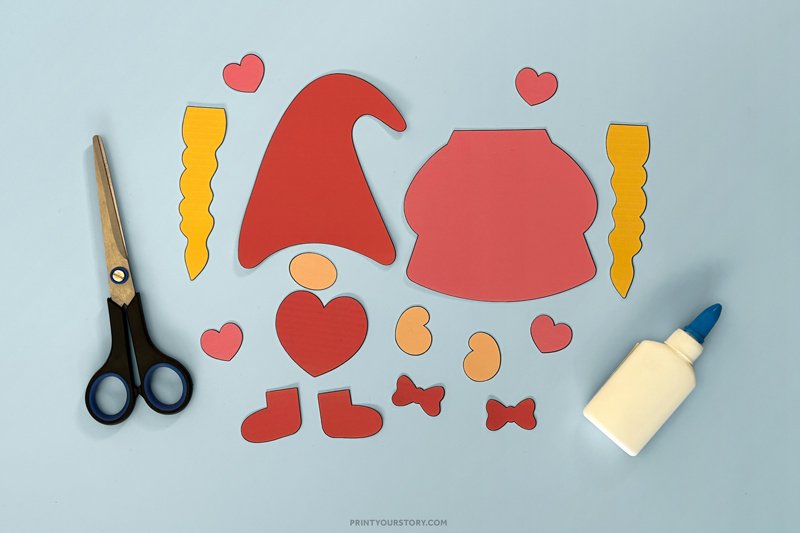
You should end up with:
- A hat
- A dress/body
- Two hands
- A nose
- Two boots
- A heart
- Two braids
- Two bows
If you’re using the Full-Color Cut & Paste Version, just cut out the pre-colored pieces.
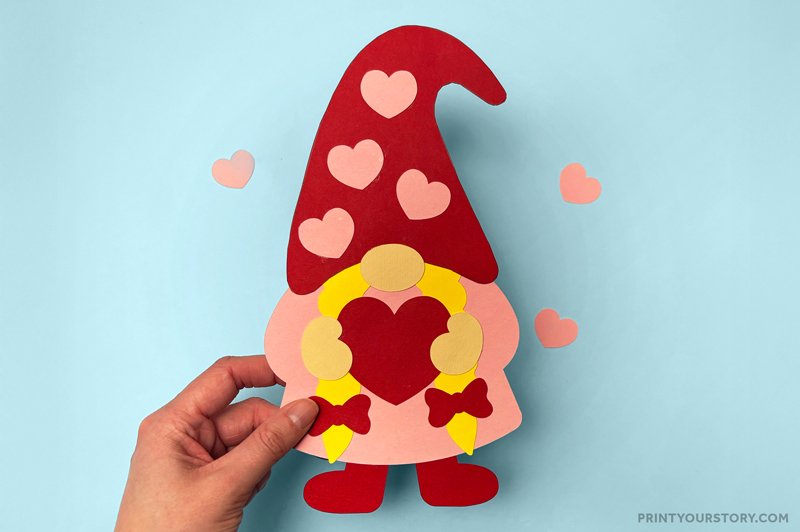
Step 5: Assemble your gnome
Now it’s time to bring your gnome to life! Here’s the order I used to assemble mine:
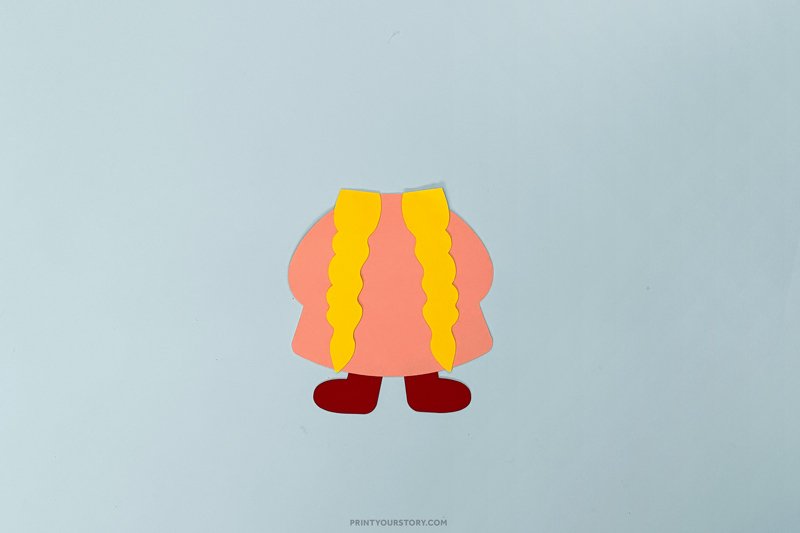
- Glue the boots behind the bottom of the dress/body piece
- Attach the braids on top of the body, one on each side
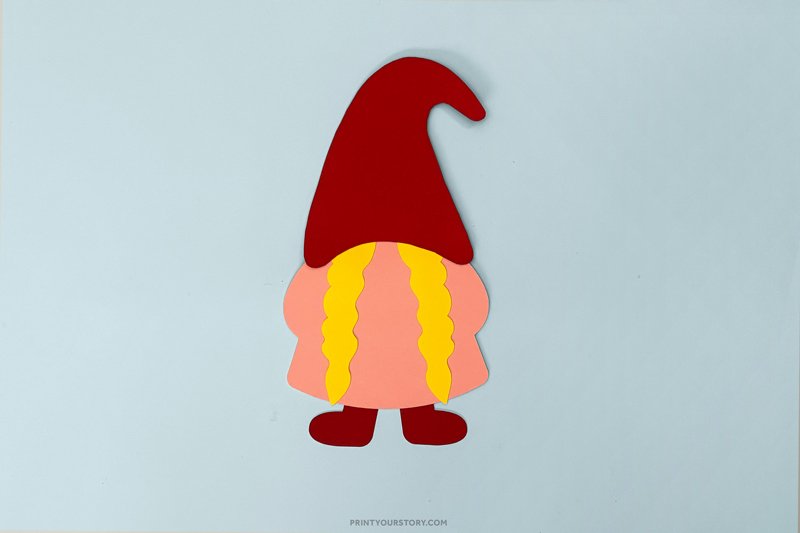
- Place the hat on top so it overlaps the braids and body
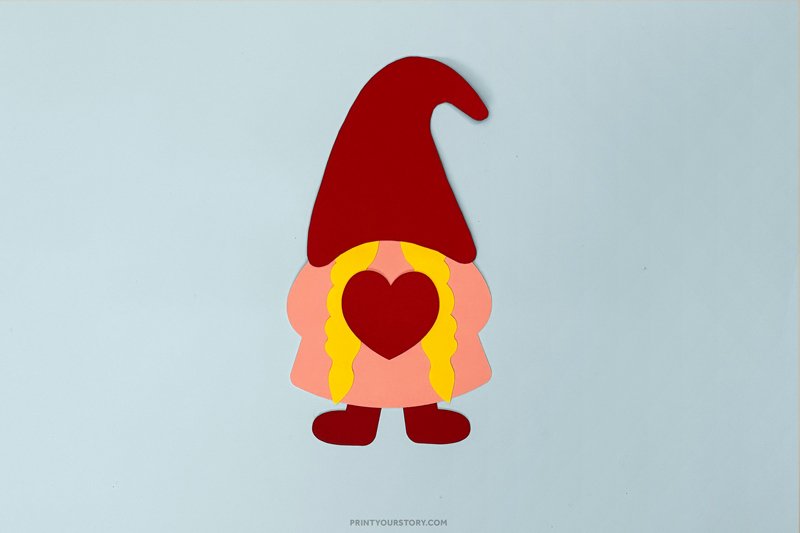
- Glue the heart to the center of the gnome’s body
- Add the hands on top of the heart so it looks like the gnome is holding it
- Glue the nose just above the heart, slightly covering the hat
- Finish by gluing the bows at the ends of the braids
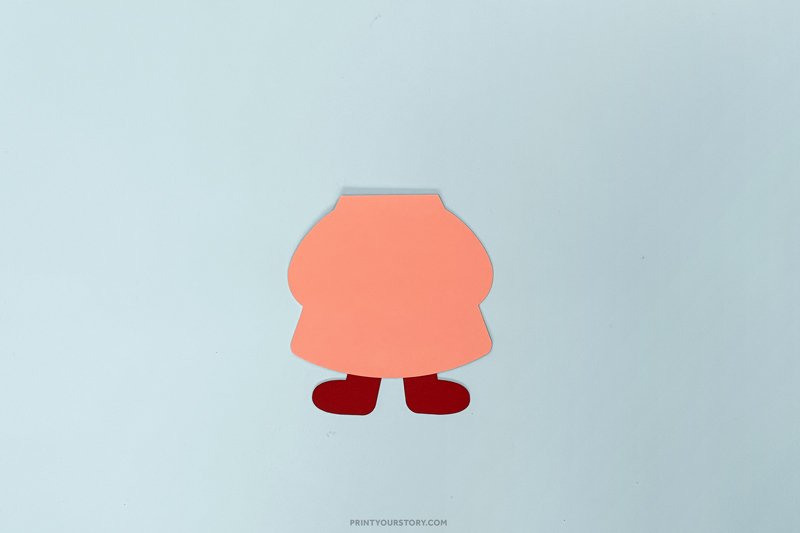
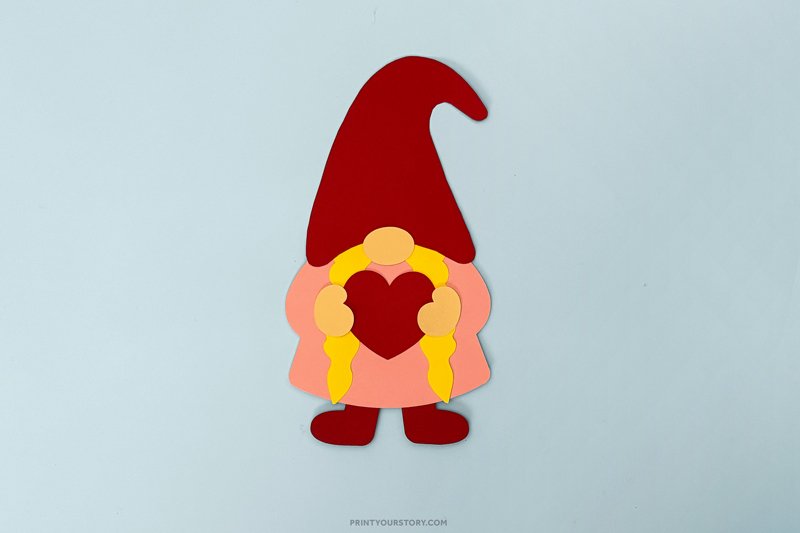
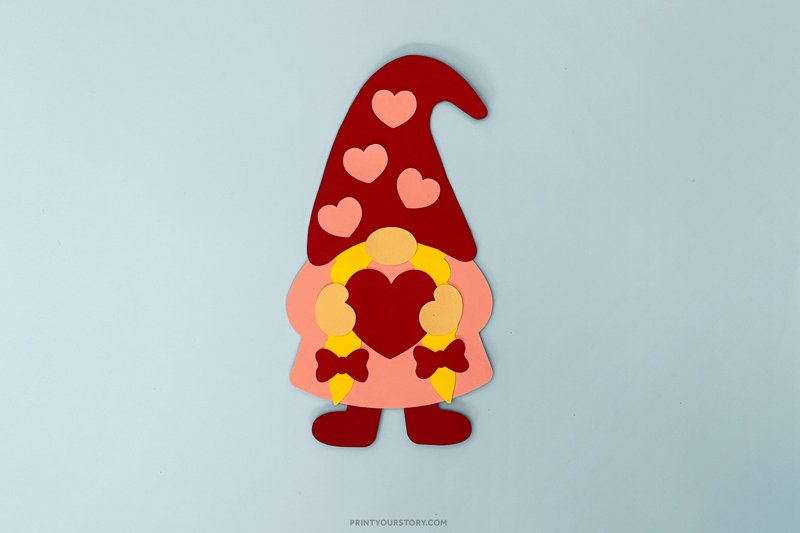
This layering gives your gnome that cute, dimensional look. Everything should line up nicely, but don’t stress about perfection, it always turns out adorable.
If you’re using the Coloring Sheet Gnome, just print it out and let them go wild with crayons or markers. It’s a great quiet-time activity!
👉 Download the Valentine Gnome Craft Templates Here
Full-Color Cut & Paste Version
Black & White Trace & Coloring Version
1-page Valentine Gnome Coloring Sheet
A Fun, Low-Prep Craft for February
This has quickly become one of my favorite printable crafts. It doesn’t take a lot of time or supplies, but it feels really satisfying to put together. Plus, it’s flexible, you can go full DIY with the tracing version or keep it simple with the pre-colored pages.
It’s also a nice craft to do alongside your child without it feeling too kid-focused. You can each work on your own version, or prep the tracing pieces ahead of time so they can assemble theirs more easily.
Happy crafting 💕