A Few Simple Fixes That Finally Made My Small Office Craft Room Work
Back when I first started crafting, I was working out of a corner in our spare bedroom. I had my Cricut machine crammed onto a tiny desk and my supplies scattered in random bins. It wasn’t ideal, but it worked, for a while.
Once I started designing more SVGs and crafting more regularly, things got out of hand. I was constantly digging through piles of vinyl, forgetting what tools I even owned, and wasting time just trying to find stuff. That’s when I decided I needed to carve out a better space, and the attic became the perfect solution.
It’s not Pinterest-perfect, and I’m okay with that. My setup is affordable, mostly from IKEA, and actually works for the way I craft. So today I’m sharing how I organize my craft room, what products I use, and some little tips that have helped me keep it functional (most days, anyway).
From Bedroom Corner to Attic Workspace
The attic isn’t huge, and the sloped ceiling made layout tricky, but it gave me something I didn’t have before – space that was all mine. No more moving machines back and forth or sharing a desk with a laptop. Now I can leave projects out mid-process, and it’s made such a difference in how much I actually enjoy crafting.
One of the best parts is being able to leave things out mid-project. If I’m in the middle of layering vinyl or working on a big paper project, I can just pause and pick it up later without having to clean it all up right away.
Main Storage: IKEA KALLAX With (Custom) Inserts
The heart of my storage is a white IKEA KALLAX shelf (5×5). It fits perfectly against one wall and holds way more than you’d think.
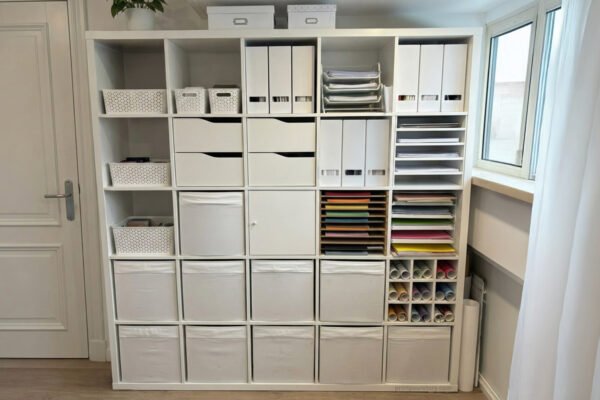
One of my favorite features is the cardstock organizer insert that my husband made for one of the cubbies. It keeps all my paper upright and visible, instead of stacked and floppy. I also use simple baskets in the other cubbies for adhesive vinyl, scraps, transfer tape, and extra tools.

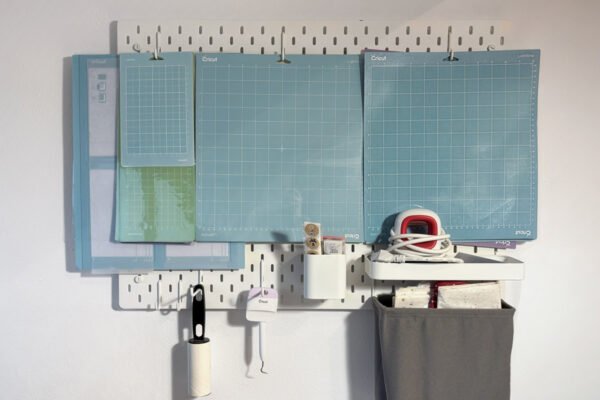
Cricut Mats: Vertical Storage That Works
Cricut mats are awkward to store, until I added an IKEA SKÅDIS pegboard. Now I hang my mats vertically with hooks, which keeps them flat and off my desk.
No more curling, stacking, or digging through a pile to find the right one.
Where I Keep My Cricut Machines
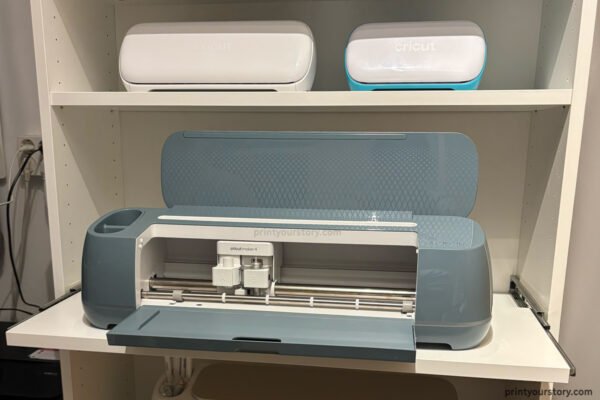
I finally upgraded my Cricut storage, and I’m so happy with how it turned out. My husband helped me turn an IKEA BILLY bookcase into a custom cabinet for all my machines, and it’s been a total game changer.
Right now, I have my Cricut Maker, Cricut Maker 4, and my two Joys all tucked neatly inside. The main shelf slides out so I can easily load materials into the Maker 4, and there’s still room underneath for my older Maker. The Joys sit up top and are super easy to grab when I’m doing quick projects.
This setup not only looks cleaner, but it also makes everything way more functional. I’ve got space for storage bins and tools, and it’s so nice having everything in one place. Definitely one of my favorite DIY upgrades so far.
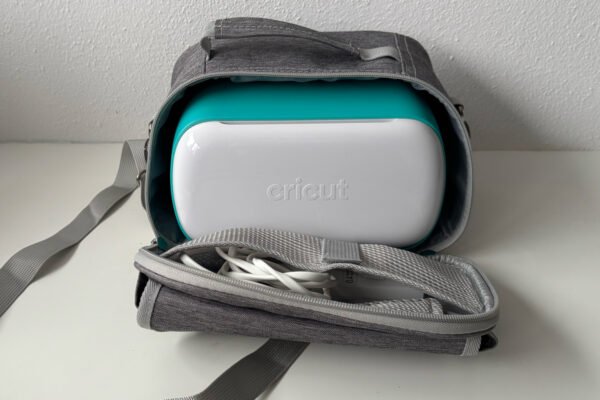
For my Cricut Joy and Joy Xtra, I use storage bags from Amazon so I can easily move them around the house when needed. They keep everything together, cords, pens, and tools, and tuck away easily when not in use.


Finished Projects + Work-in-Progress Folders
In my desk drawer, I keep two simple plastic folders: one labeled “Finished” and another labeled “Work in Progress.” That way I can clear off my workspace without totally losing track of where I left off.
Not fancy, but it’s made things feel a lot more manageable.
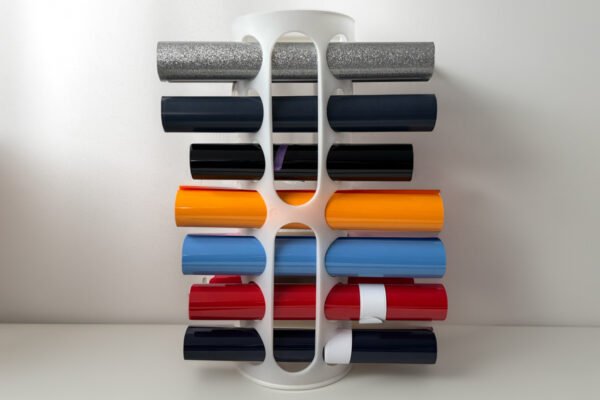
Heat Transfer Vinyl Storage: IKEA VARIERA Dispenser
HTV rolls used to be the messiest part of my setup. Now I use IKEA VARIERA dispensers to keep them tidy and easy to access.
Cricut Tools: Pegboard + Built-In Storage
I used to keep all my tools tossed in a drawer. Now I store most of them in the compartments inside my Cricut machines, and the rest on my pegboard.
The built-in storage holds scissors, weeding tools, pens, and anything else I use often. It’s all right in front of me while I work.

How I Label Everything (Without Overcomplicating It)
I used to make all my labels with my Cricut, and while that was fun, I’ve since switched to using a label maker my husband has for work. It’s way quicker, especially when I’m reorganizing on the fly or just need to label a new bin.
The labels are simple, just black text on white tape, but they get the job done. And I kind of like the clean, uniform look. I use them on my KALLAX baskets, vinyl bins, and even inside drawers for little categories like “scraps” or “transfer tape.”
If I ever want something more custom, I’ll still design and cut my own with the Cricut. But for day-to-day organization, the label maker wins for speed.
5 Quick Tips That Help Me Stay Organized
- Store like with like. Group your materials by type (HTV, adhesive vinyl, cardstock) so they’re easier to find.
- Label everything. Even the obvious stuff.
- Use vertical space. Pegboards and wall hooks = game changers.
- Purge regularly. I do a mini clear-out every couple months to keep clutter down.
- Make things easy to grab. If it’s buried or hard to reach, it’s going to collect dust.
Final Thoughts
My craft room isn’t huge. It’s not perfectly styled or Instagram-ready. But after a few simple fixes and the right storage tools, it finally works for how I craft.
If you’re trying to make your own small space functional, whether it’s a corner of the bedroom, a closet, or an attic, I hope this gives you a few ideas. And remember, it doesn’t have to be perfect.