Layered Paper Poinsettia Flower with Free SVG File for Cricut
Christmas is my favorite season for crafting. I love simpler projects because I don’t have a lot of energy, especially around the holidays when everything feels a little hectic. That’s why I always come back to paper crafts. They’re relaxing, low-mess, and can be done in small batches whenever I feel up to it.
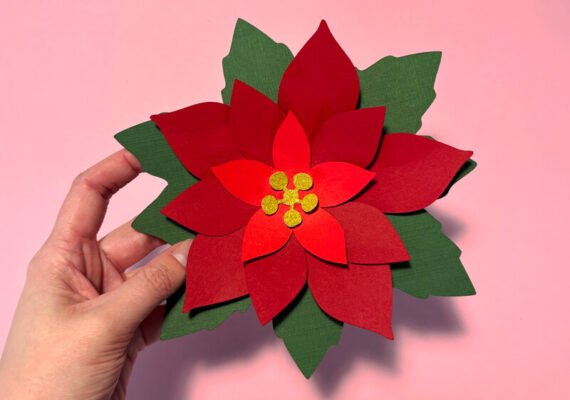
The flower has just three layers of red petals, a simple yellow center, and a green leaf base. No scoring lines, no crazy assembly. You can cut everything in one go with your Cricut or other cutting machine, and it all comes together in minutes. I’ve made a handful already and plan to use them on gift boxes, garlands, and maybe even a wreath.
The petals are slightly curved for a 3D look, and layering them differently each time makes every flower feel unique. I kept the design classic with red and green, but you can totally mix it up with pink, white, or glitter cardstock too.
What You’ll Need:
- My free poinsettia SVG file (download below)
- Cricut machine, or other cutting machine that supports SVG files
- Two or three shades of red, green, and gold cardstock
- Glue (tacky glue is my favorite)
- Optional: scoring stylus if you want to add some extra folds yourself and have a Cricut Maker or Explore
How to Make this Layered Paper Craft
1. Upload the SVG file to Design Space
Open Cricut Design Space and upload the poinsettia SVG file. Insert it onto your canvas and resize if needed.
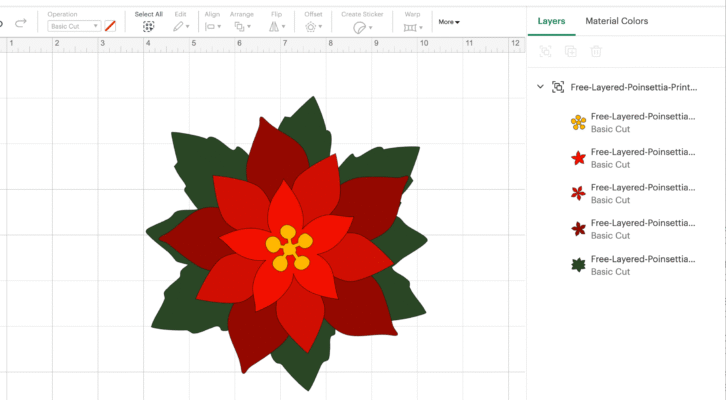
2. Cut the Layers
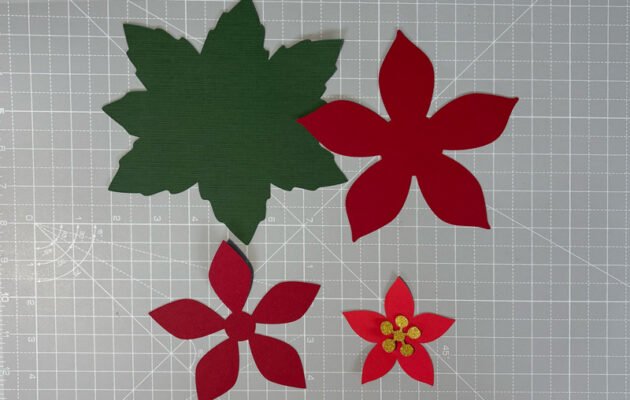
Place your cardstock onto the mat and follow the prompts to cut each layer: green for the leaves, two/three shades of red for the petals, and gold for the center.
3. Shape the Petals
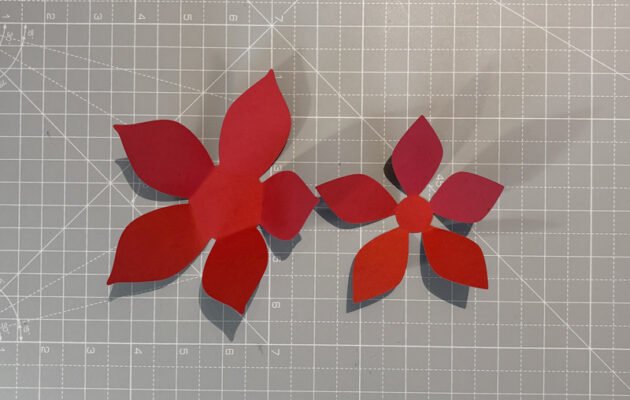
Gently fold each red petal piece inward along the center to give them some dimension. You can use your fingers or a scraper tool to curl them slightly for a more natural look.
4. Attach the Center
Glue the gold or yellow center piece right in the middle of the smallest red petal layer before stacking. This makes it easier to line everything up as you go.
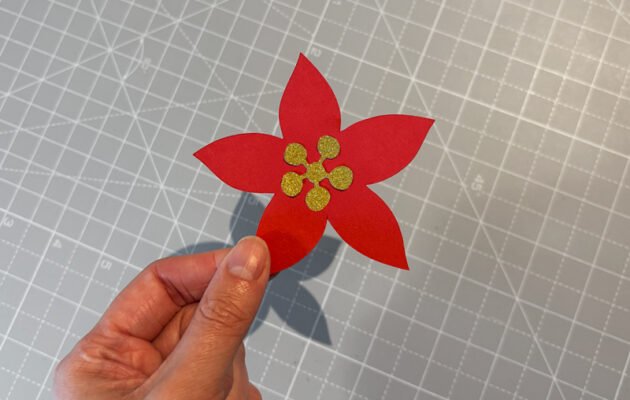
5. Layer the Petals
Stack the three red petal layers on top of each other, starting with the largest and working up to the smallest (with the center already attached). Rotate each layer slightly so the petals are staggered and create a full, realistic look. Try mixing up the rotation if you’re making several flowers, each one will feel just a little different.
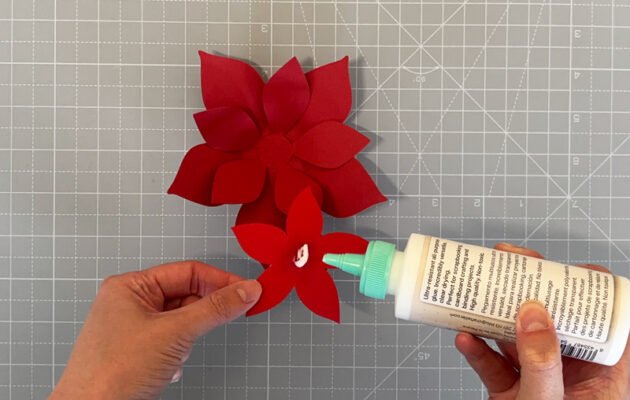
6. Add to the Green Base
Once the red layers are dry and secure, glue the whole flower onto the green leaf layer to complete your poinsettia.
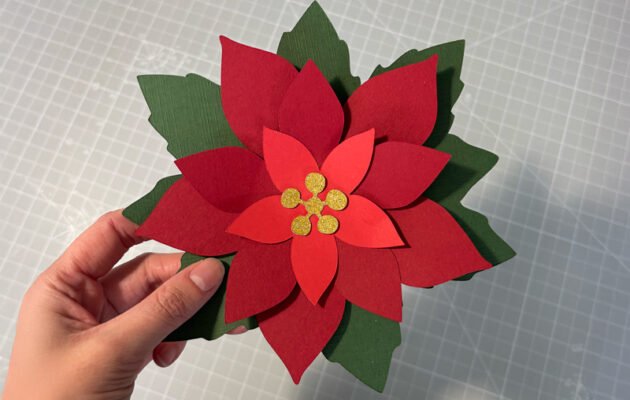
If you’re looking for a low-effort holiday project that still looks gorgeous, this is a great one to try. You can make this flower in classic red and green like I did, but it’s also really pretty in white, blush pink, or even metallic cardstock. I think a mix of colors would be beautiful for a holiday tablescape or as part of a handmade centerpiece.
And because the design is so simple, it’s easy to scale up or down depending on what you need.
What’s included:
1x SVG file
– Personal use only
– Commercial license available for $3
My favorite tools to use with the free SVG files:


I hope you enjoy making these as much as I do. It’s one of those crafts that’s low-effort but high-reward. Don’t forget to grab your free SVG file below and tag me if you share your creations, I’d love to see how you use your poinsettias this season!
Free Layered Poinsettia Flower SVG file
Free-Layered-Poinsettia-PrintYourStoryCom.svg.zip – downloaded 43 times
Come show off your crafts in my Facebook Group!